The combination of small details is what will help us enjoy a delightful Christmas dinner. After explaining how to choose a good tablecloth for the Christmas table and giving some ideas for decoration in these holidays, in today’s post we invite you to introduce a Christmas element by means of the napkins. A functional element, yet with great decorative possibilities, because… We are going to learn how to fold cotton napkins in an original and 100% Christmassy way!
Video: How to transform a cotton napkin into a Christmas tree
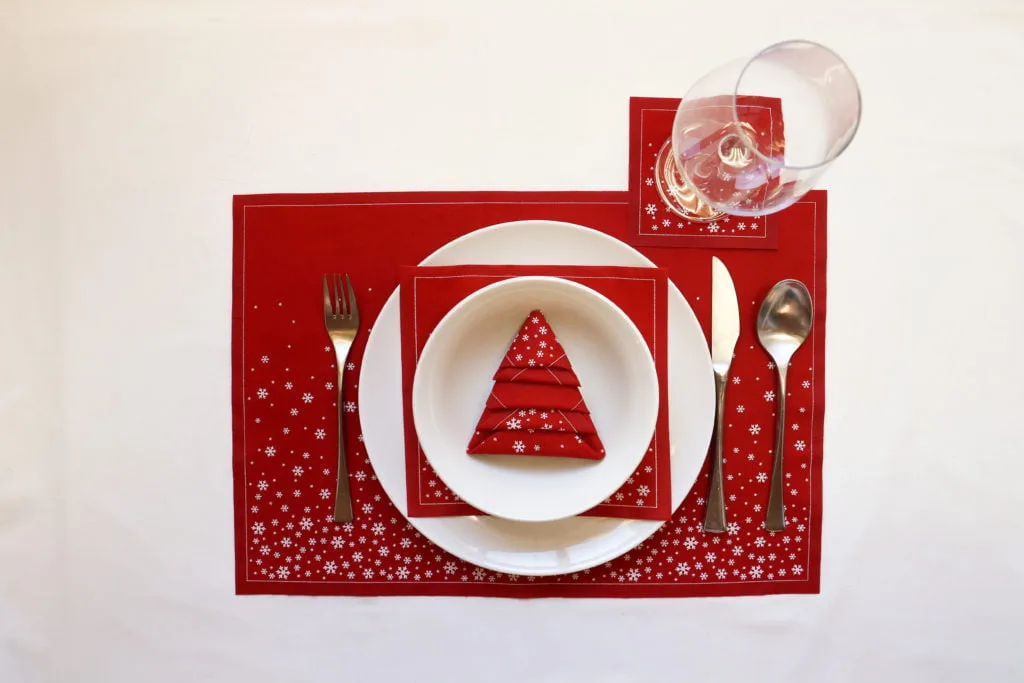
A first idea to impress diners of all ages is to turn the cotton napkins into pretty firs, an unmistakable symbol of Christmas. In the following video we show you how to do it so you can try with ease at home. Below we also include some photos and a more detailed explanation of the process if you want check, more slowly, all the steps to achieve it. So pick up some napkins with Christmas patterns such as our red snowflake-patterned Christmas napkins and get practicing! You will give a different and fun touch to your Christmas table!
Video: How to fold cotton napkins for formal Christmas tables
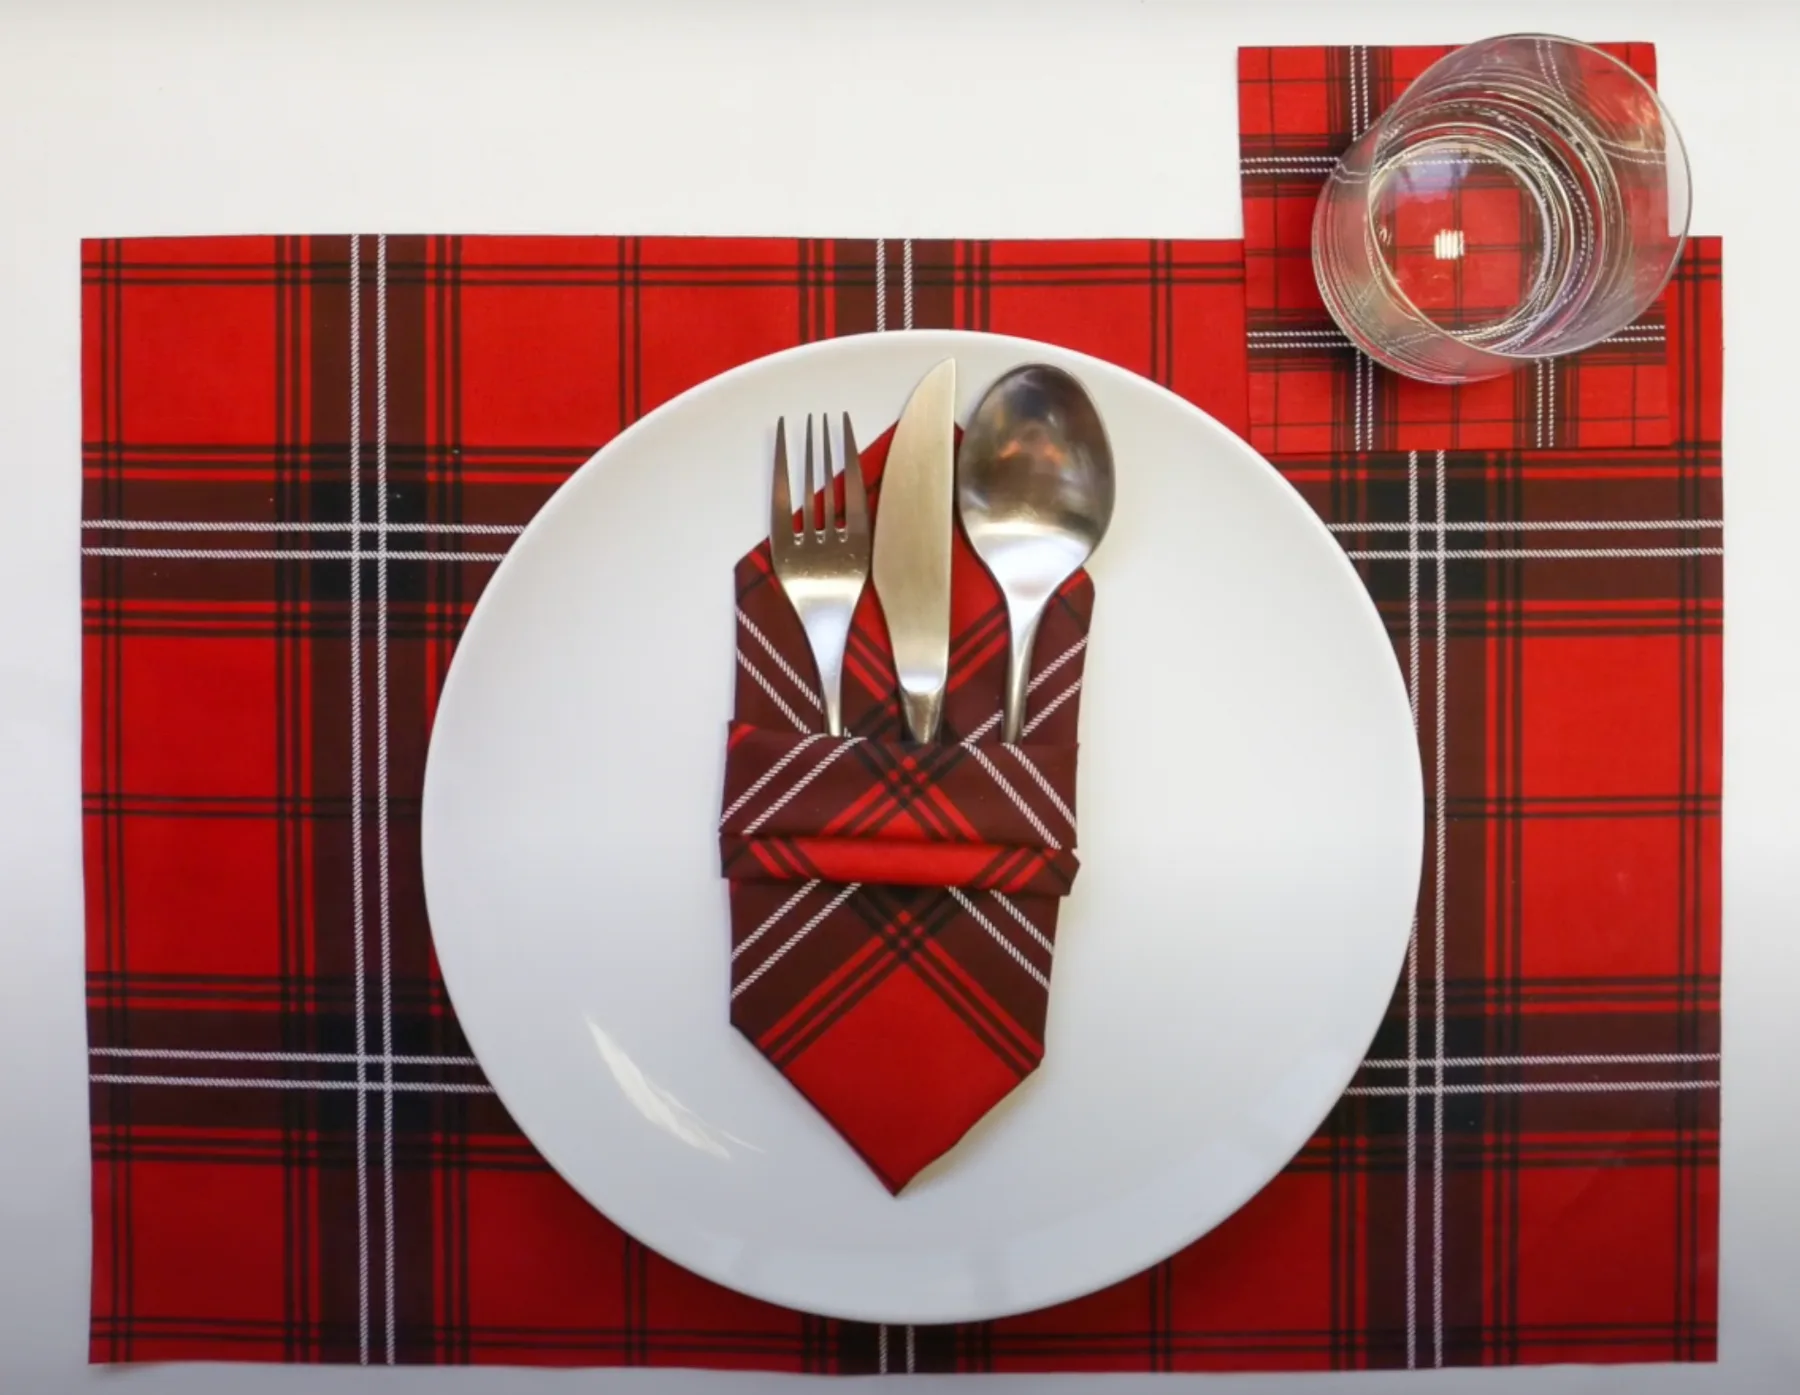
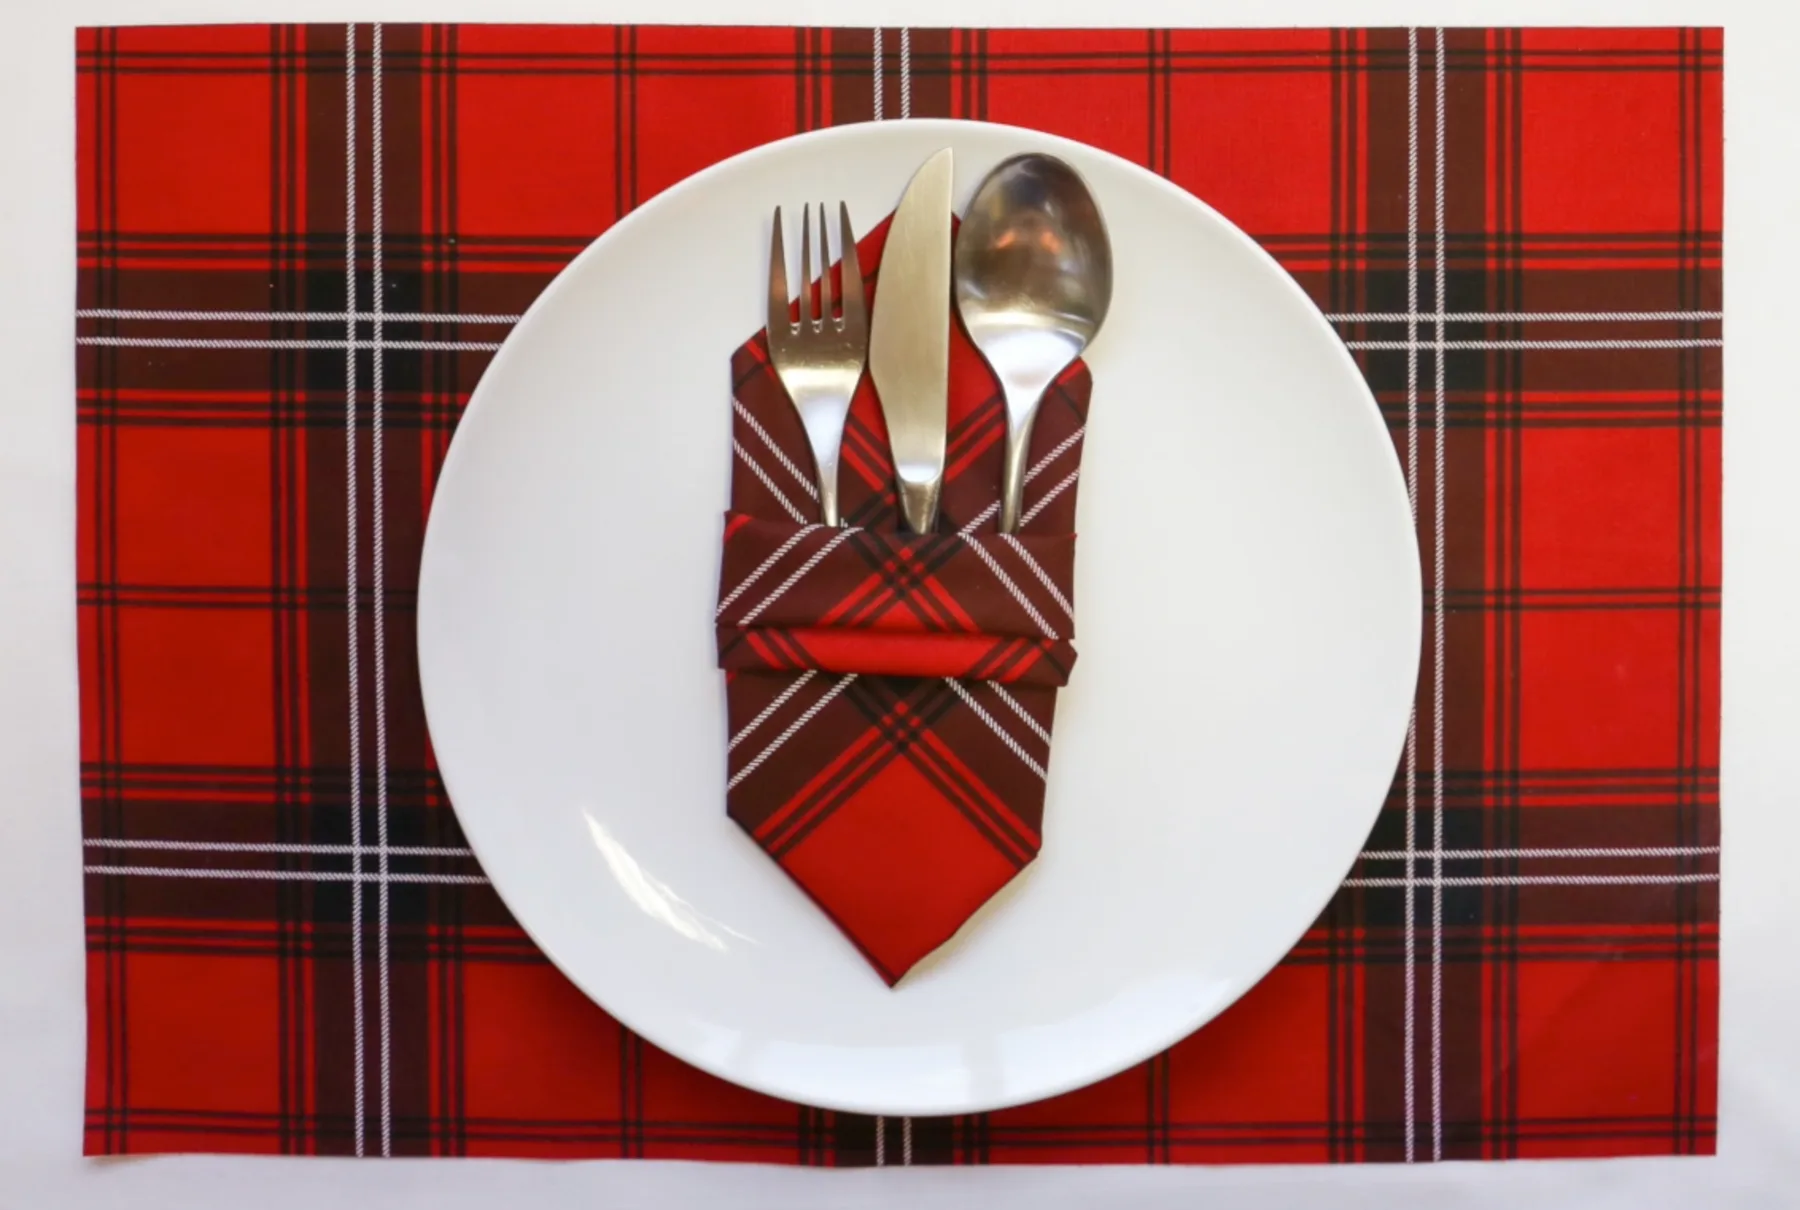
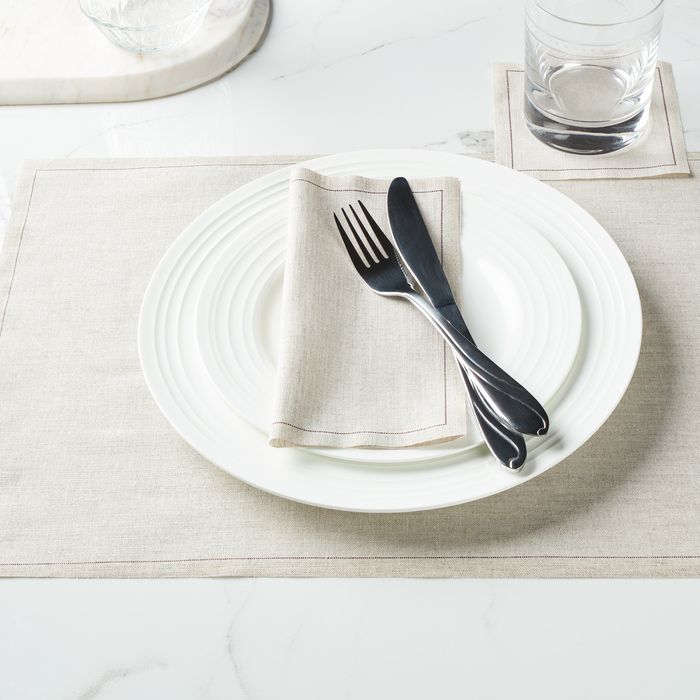
For more exquisite celebrations, a good idea is to present the cotton napkins transformed into stylish cutlery holders. We recommend doing it with regular-patterned fabrics, such as the elegant Scottish tartans from the Christmas Tartan collection. Discover how easy it is to surprise your guests in the following video! Below we also tell you, step by step, how to do it. Oh, and if you still haven’t read it, check out the post with tricks and tips to fold cotton napkins successfully.
Step by step: how to transform a cotton napkin into a Christmas tree
Below we explain to you the magic formula to turn the cotton napkin into one of the most universal symbols of Christmas. It just means following a few simple steps:
1- Place the cotton napkin in front of you, with the pattern facing upwards.
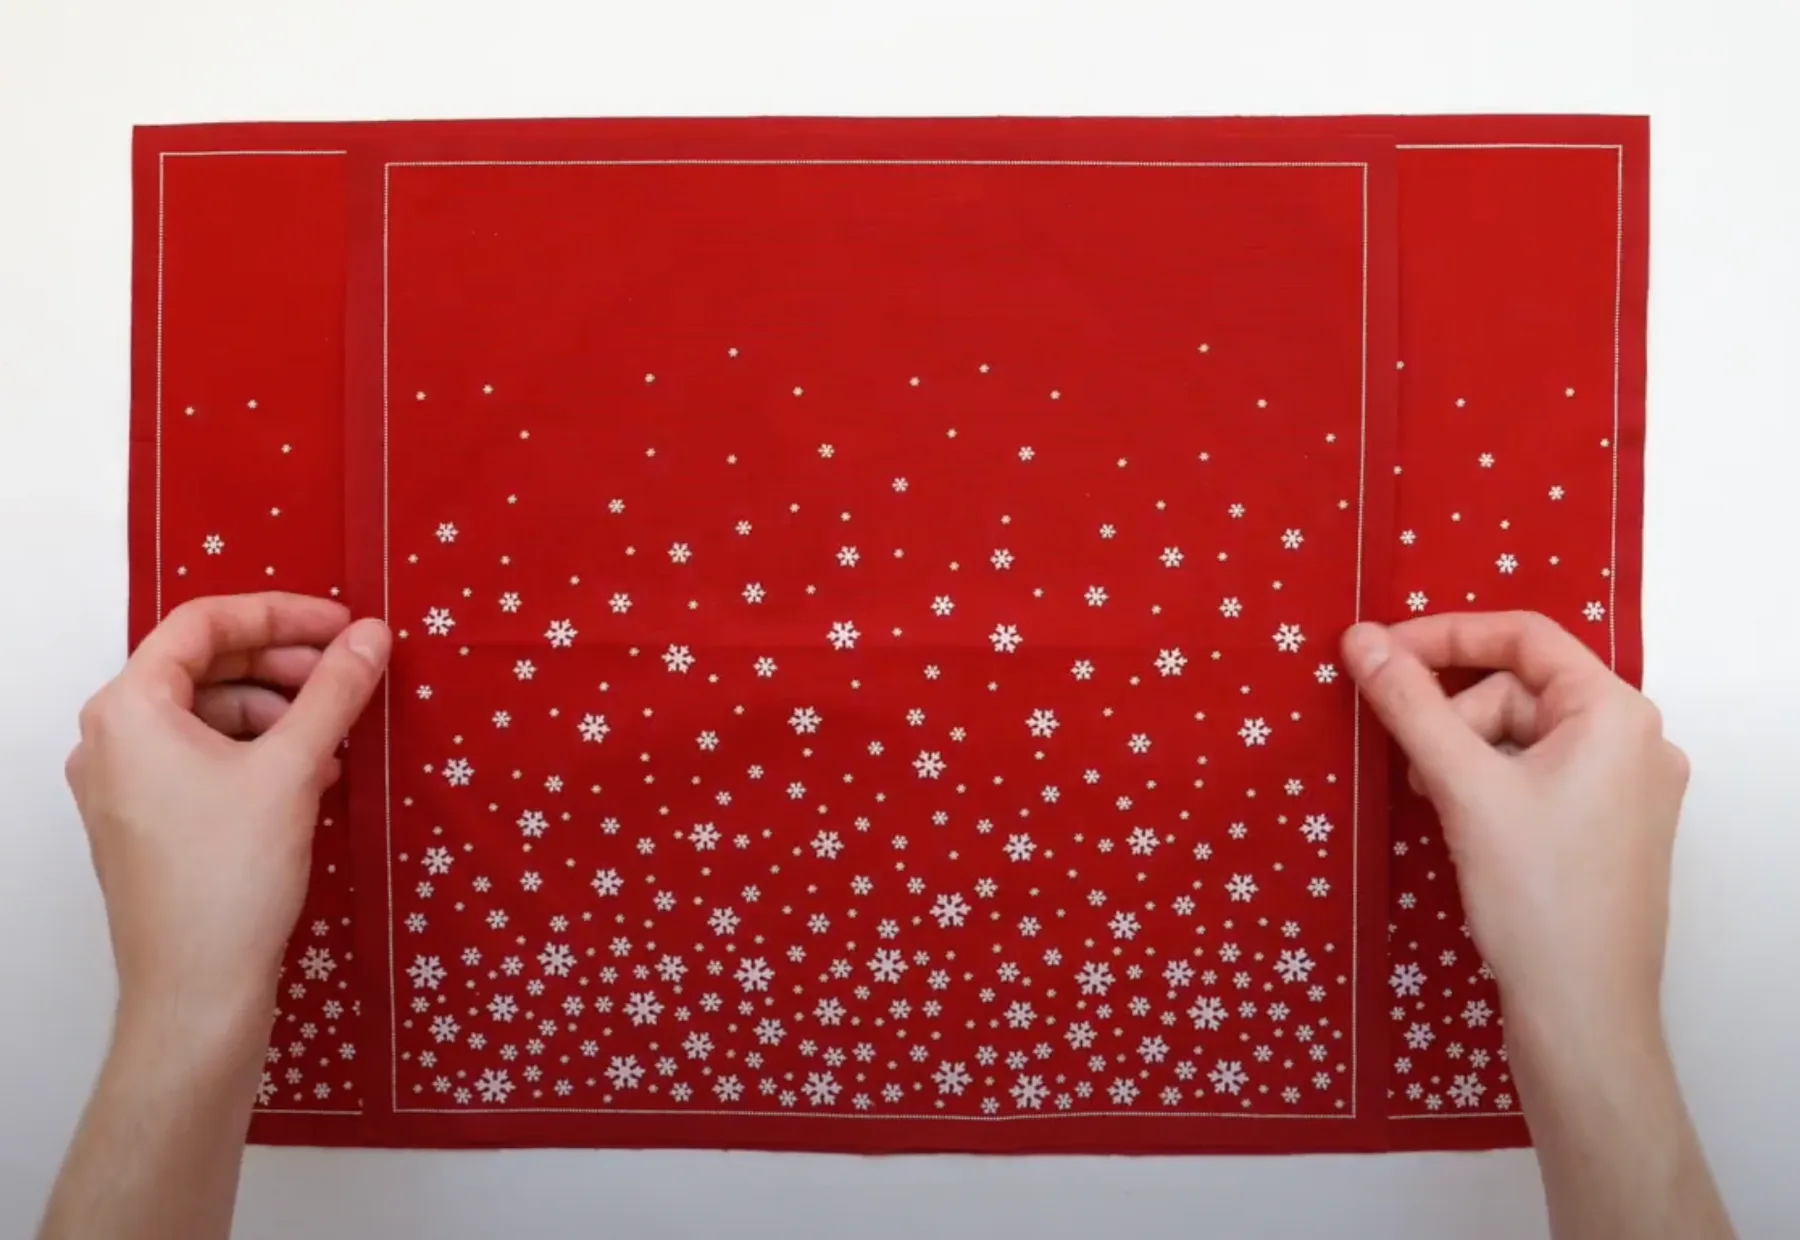
2- Fold the napkin in half, joining the lower corners with the upper ones.
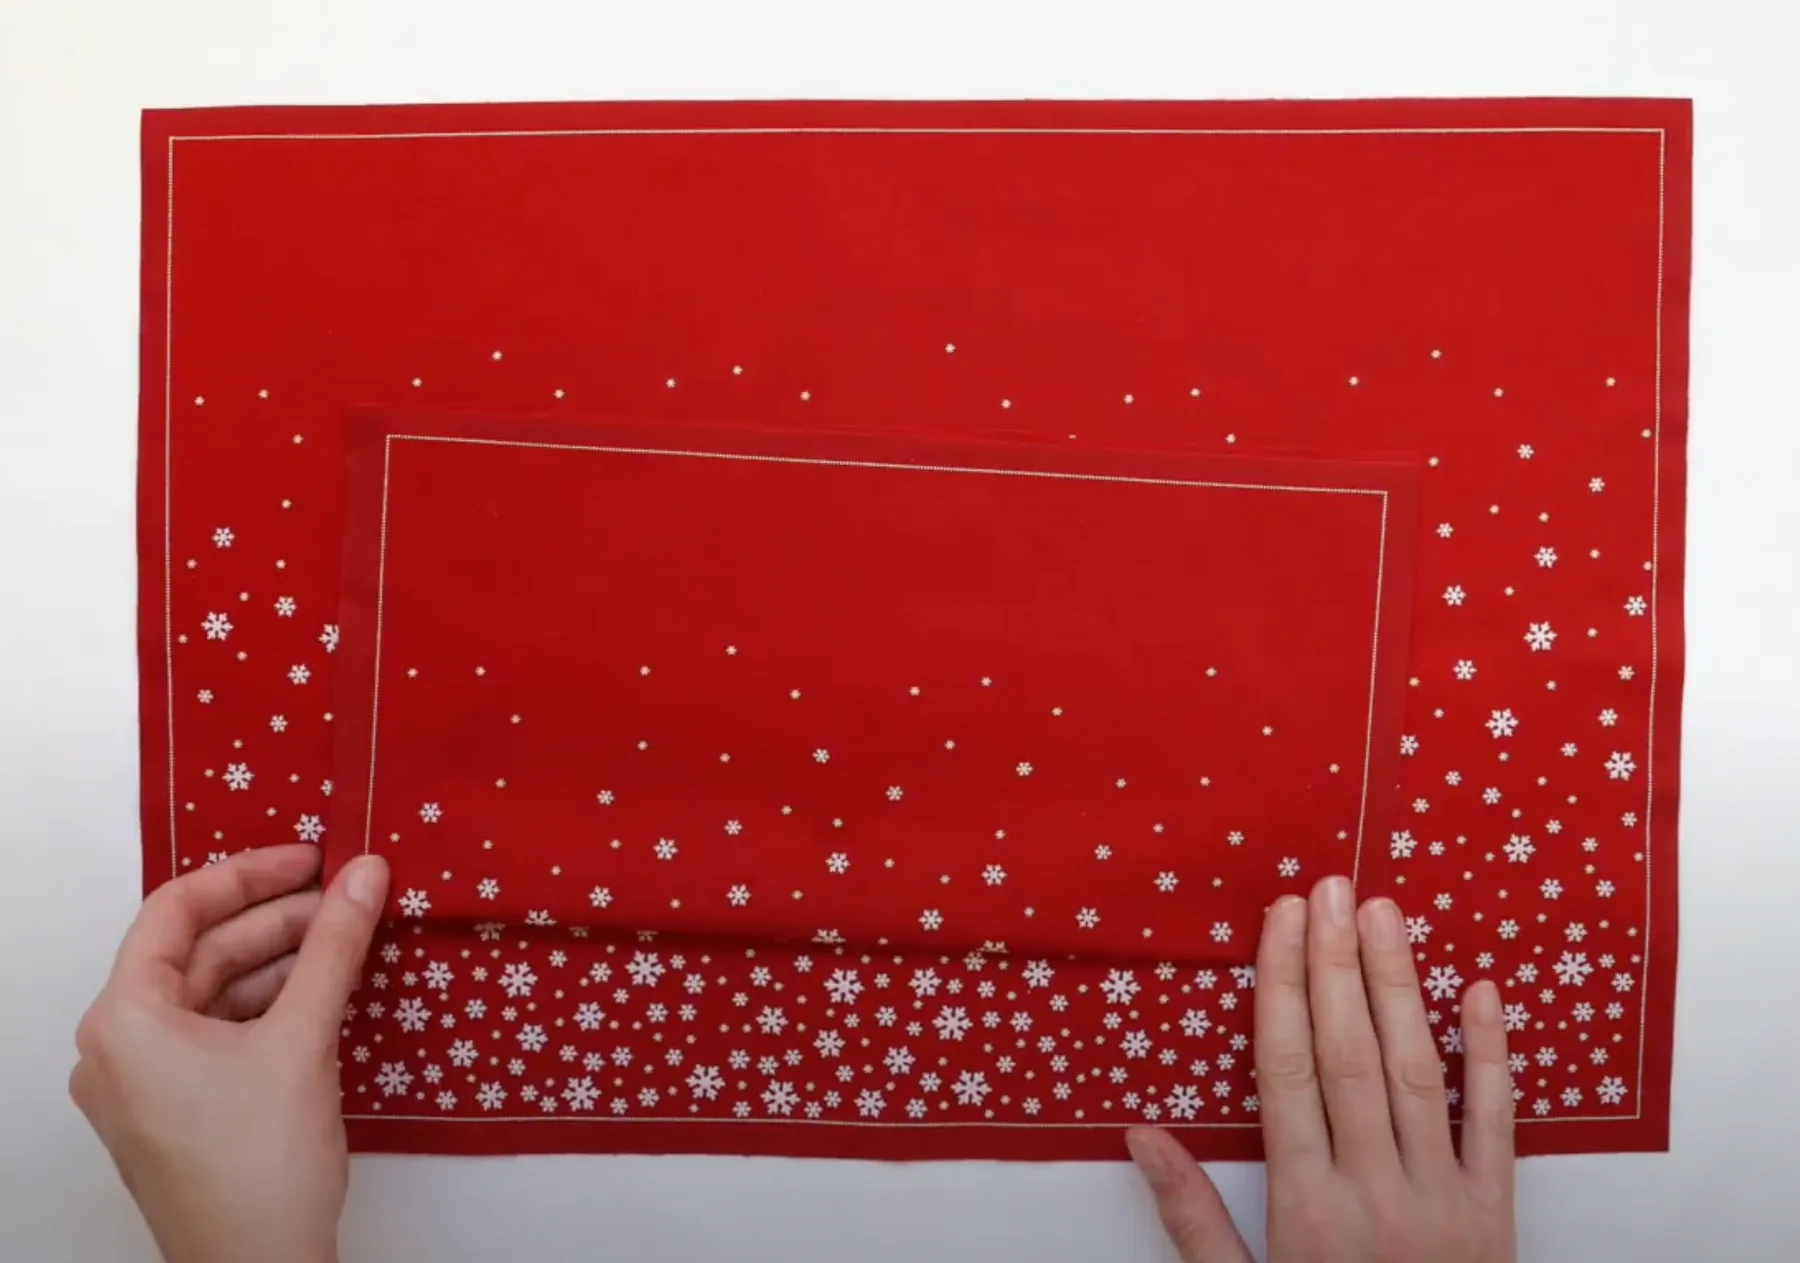
3- Fold the napkin in half again so that it becomes a square: fold the corners of the left end towards the corners of the right end.
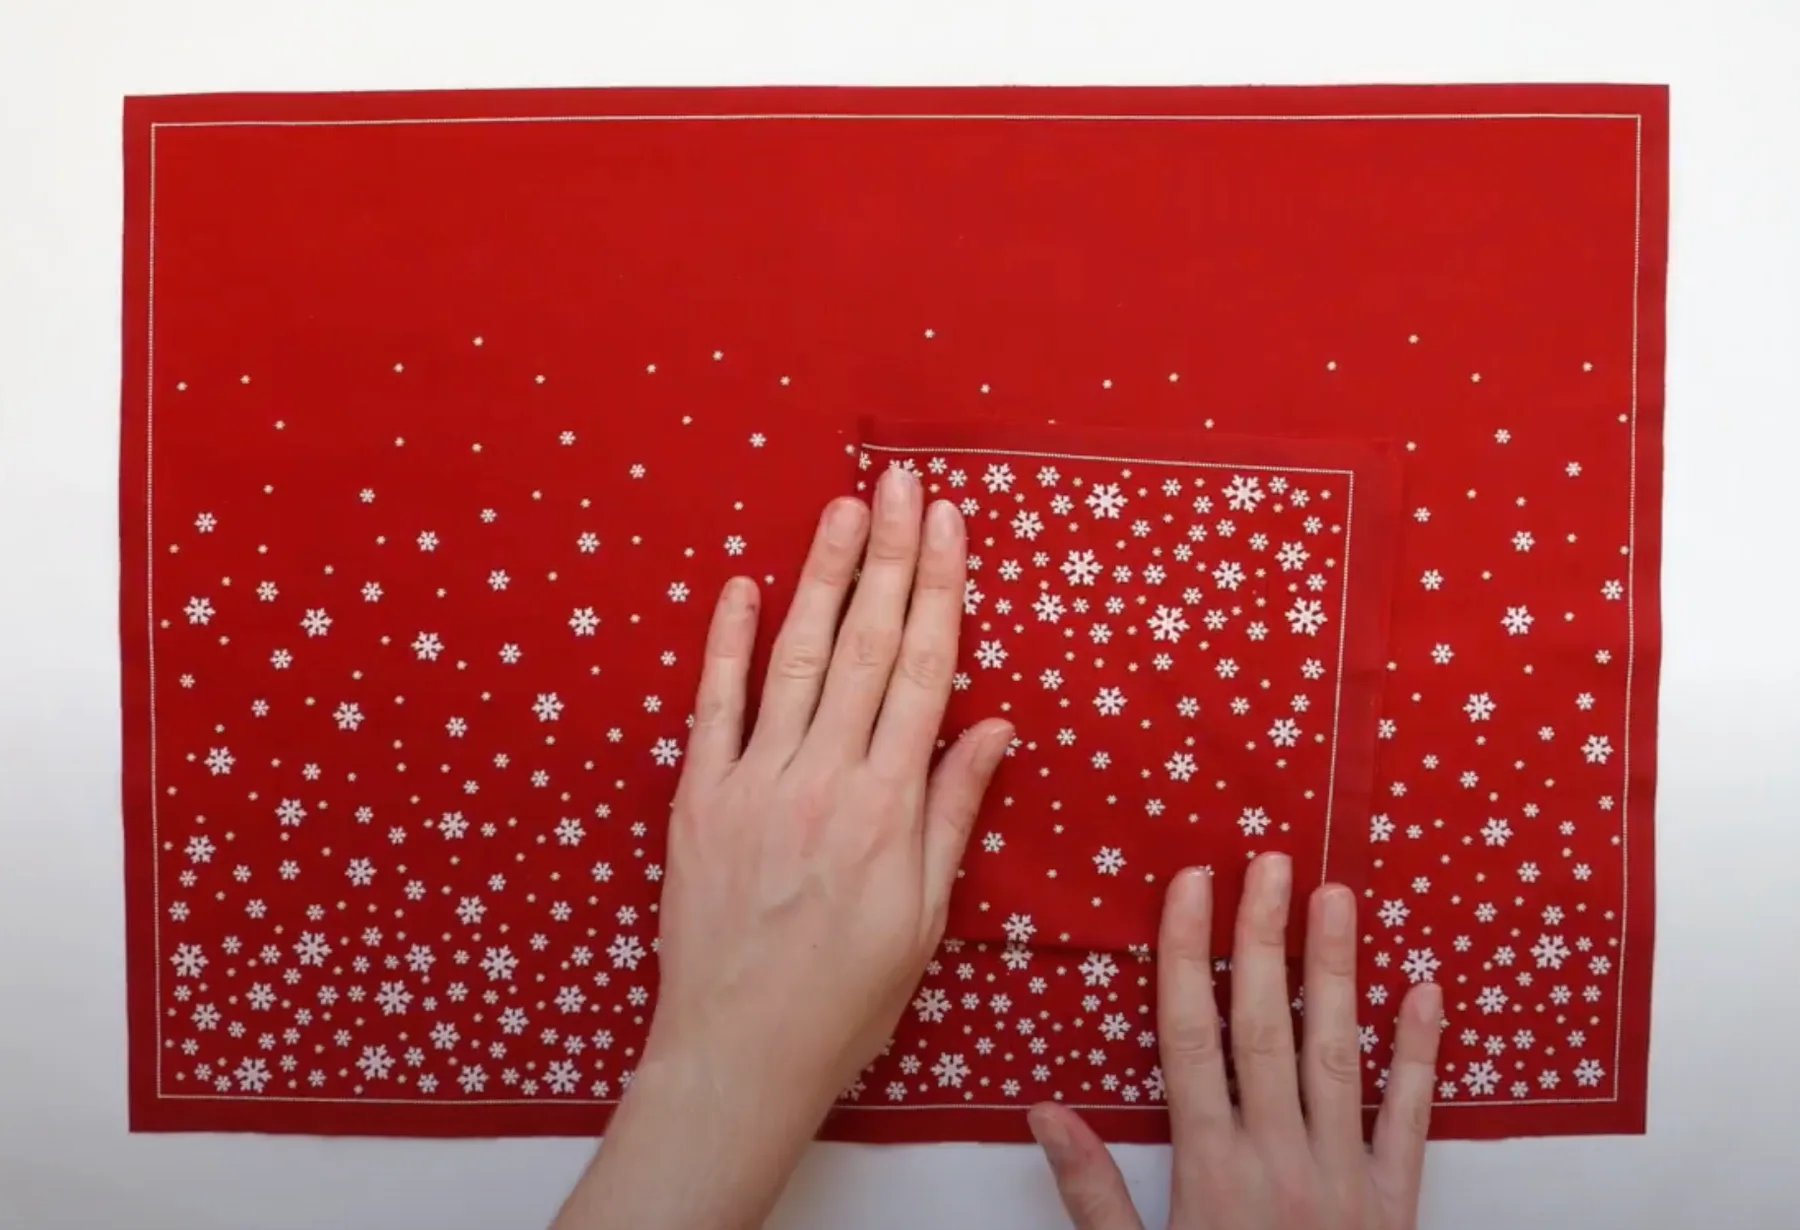
4- Place the cotton napkin in the shape of a rhomboid before you. The open sides must be at the lower ends. From the first layer of the cotton napkin (the most external), take the lower corner and fold it upwards, towards the upper corner but without reaching it (remaining a little below).
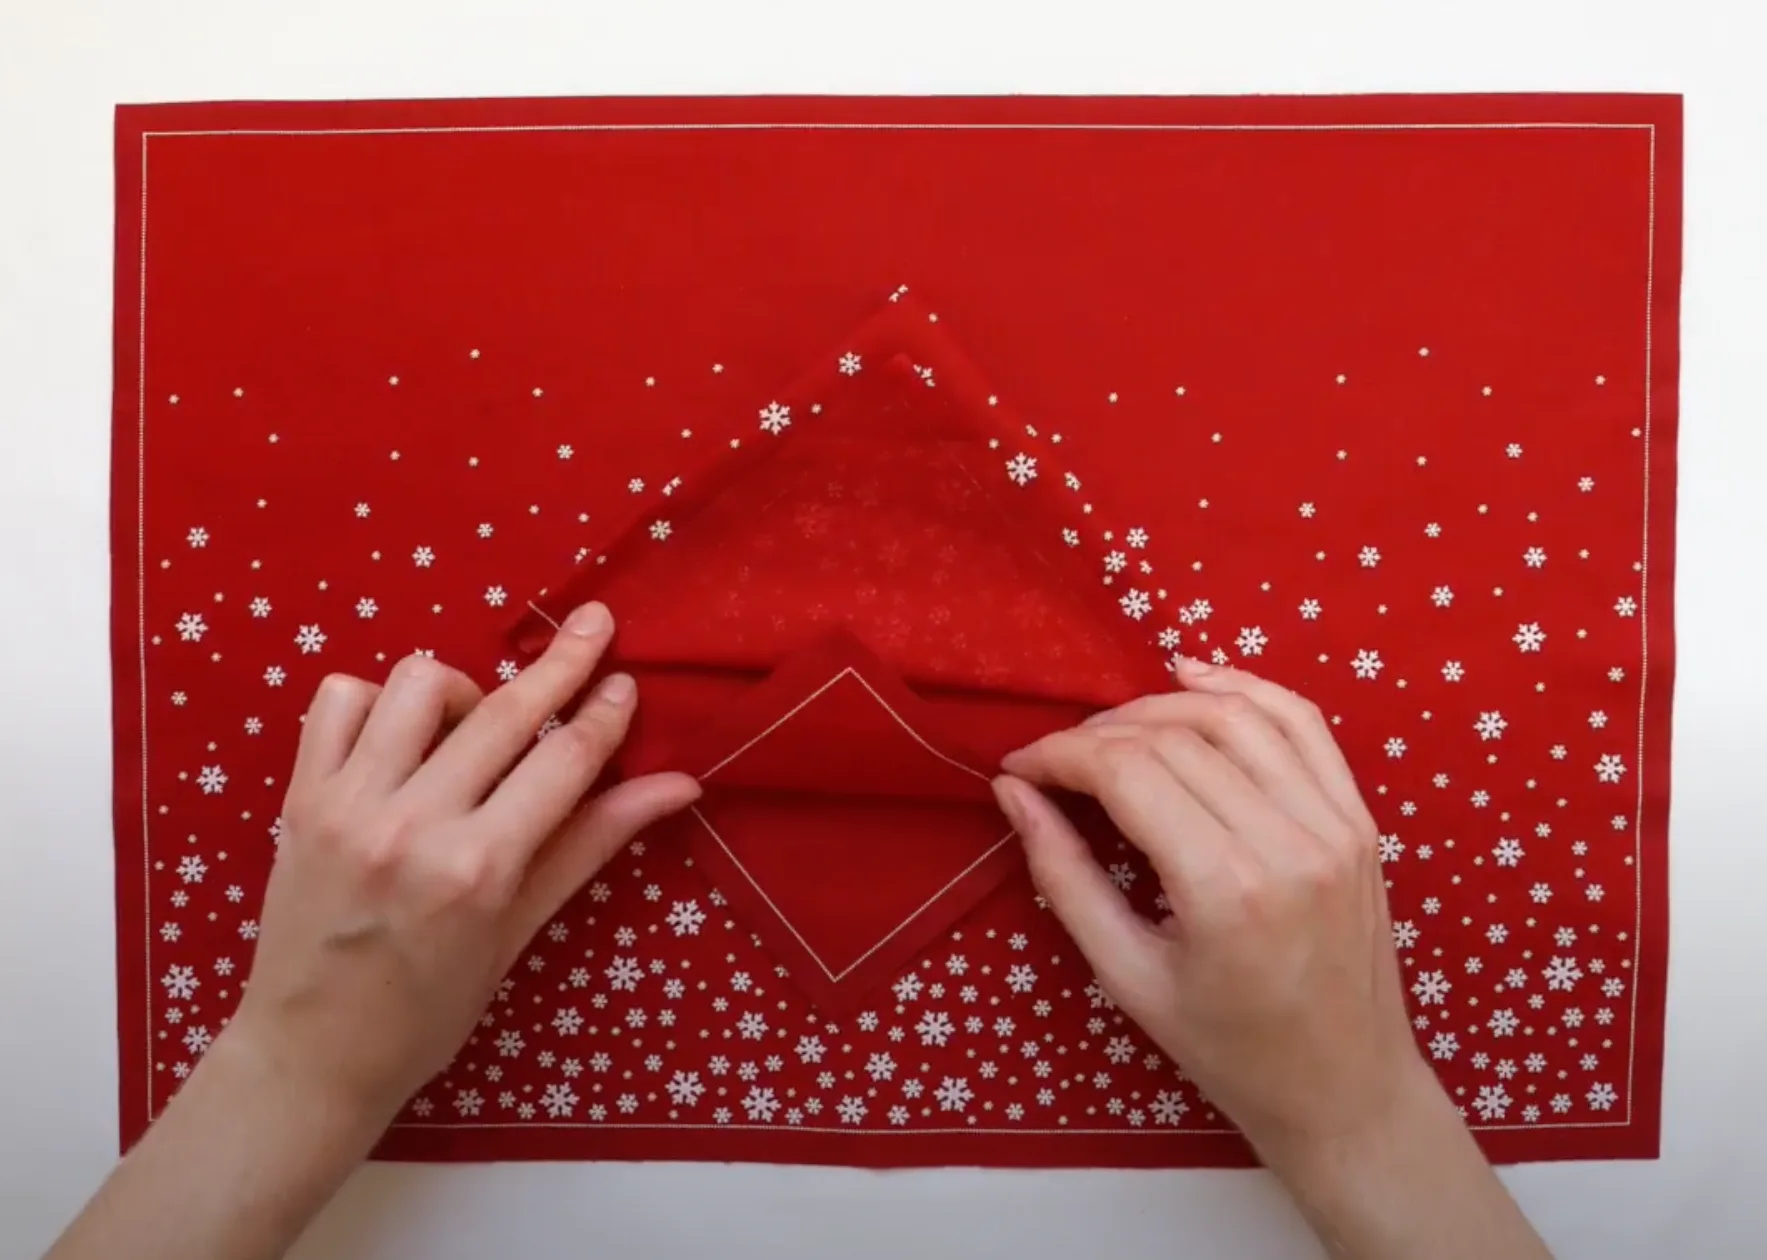
5- Now with the second layer of the cotton napkin: take the lower corner again and fold it upwards. This second layer remains below the first one, so that the different triangles remain visible. Repeat the movement with the following layers of the cotton napkin.
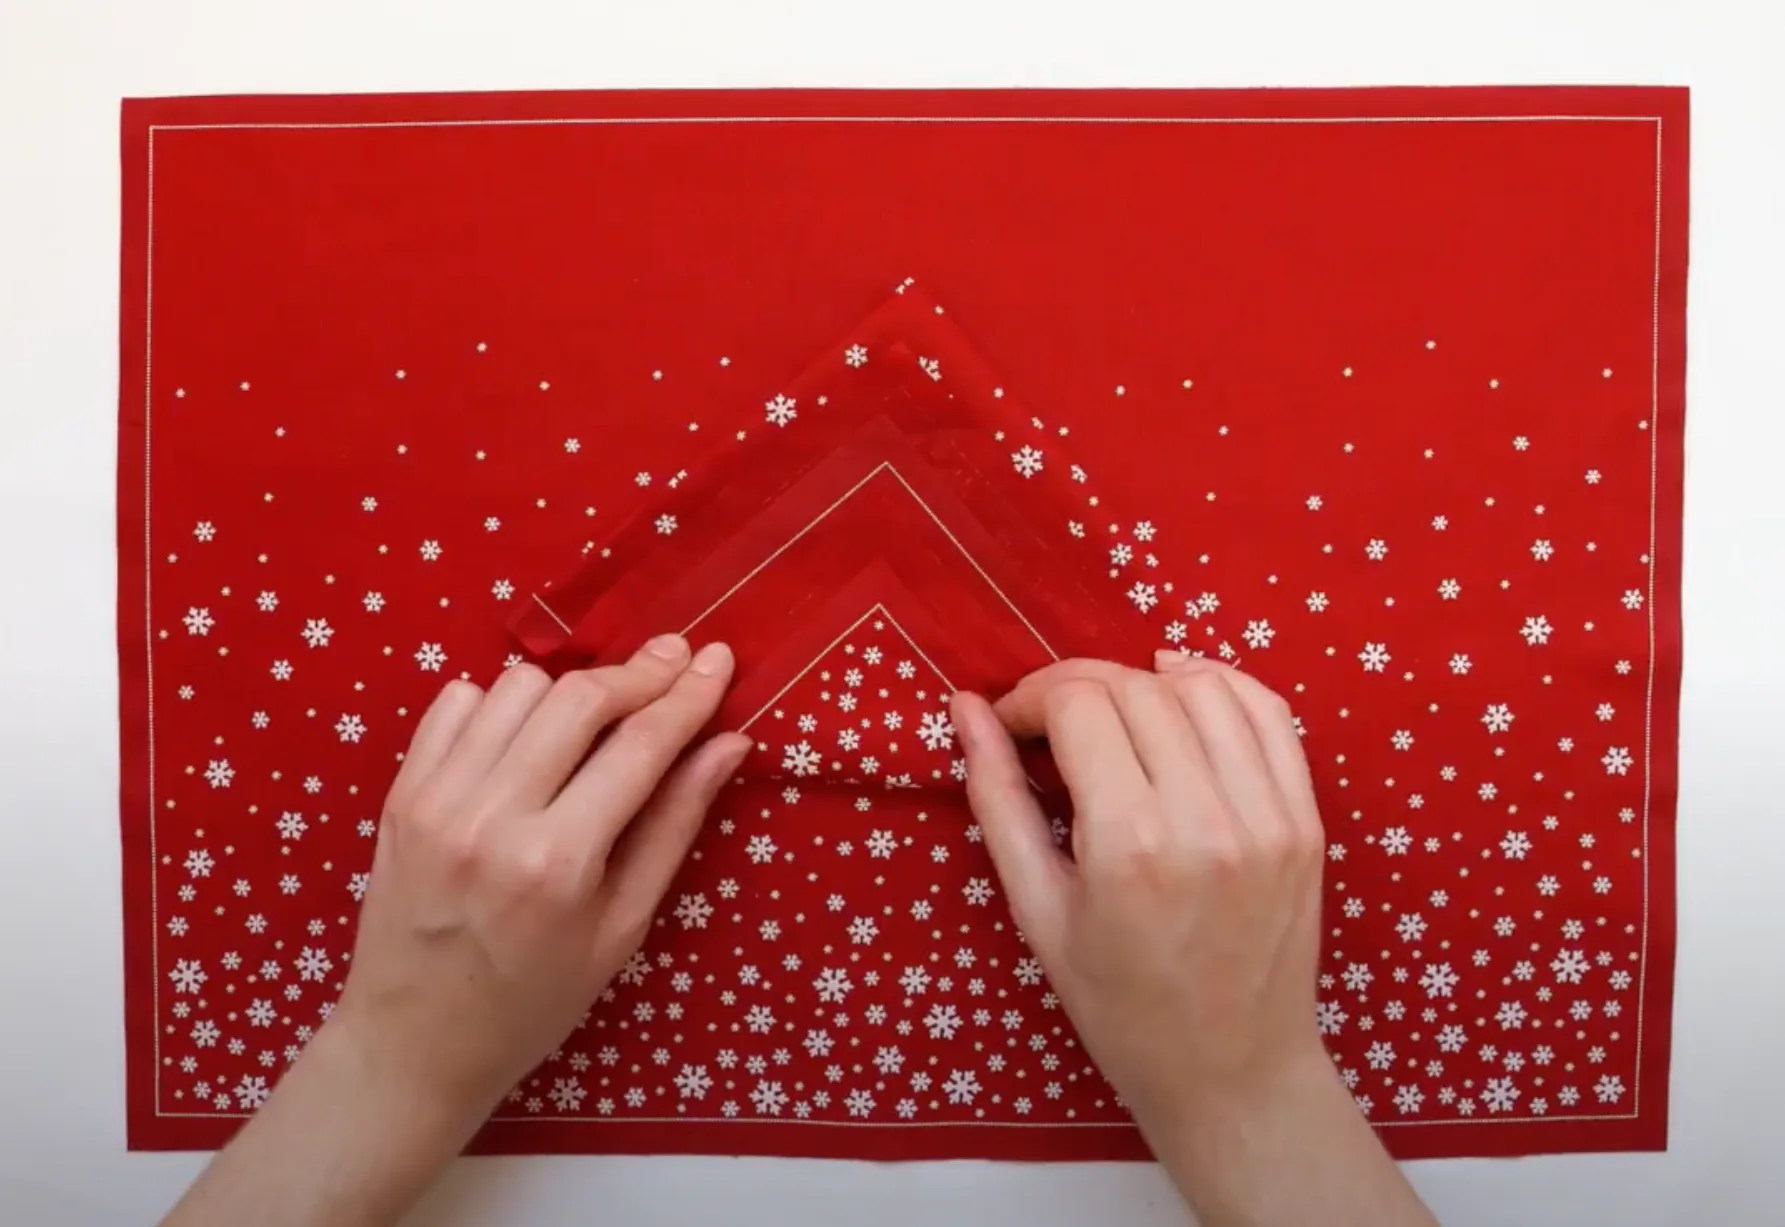
6- Turn the cotton napkin over, so that the folds are now facing down, equally in a rhomboid position. Fold the right-hand corner towards the half of the upper left side. Repeat the movement with the left corner.
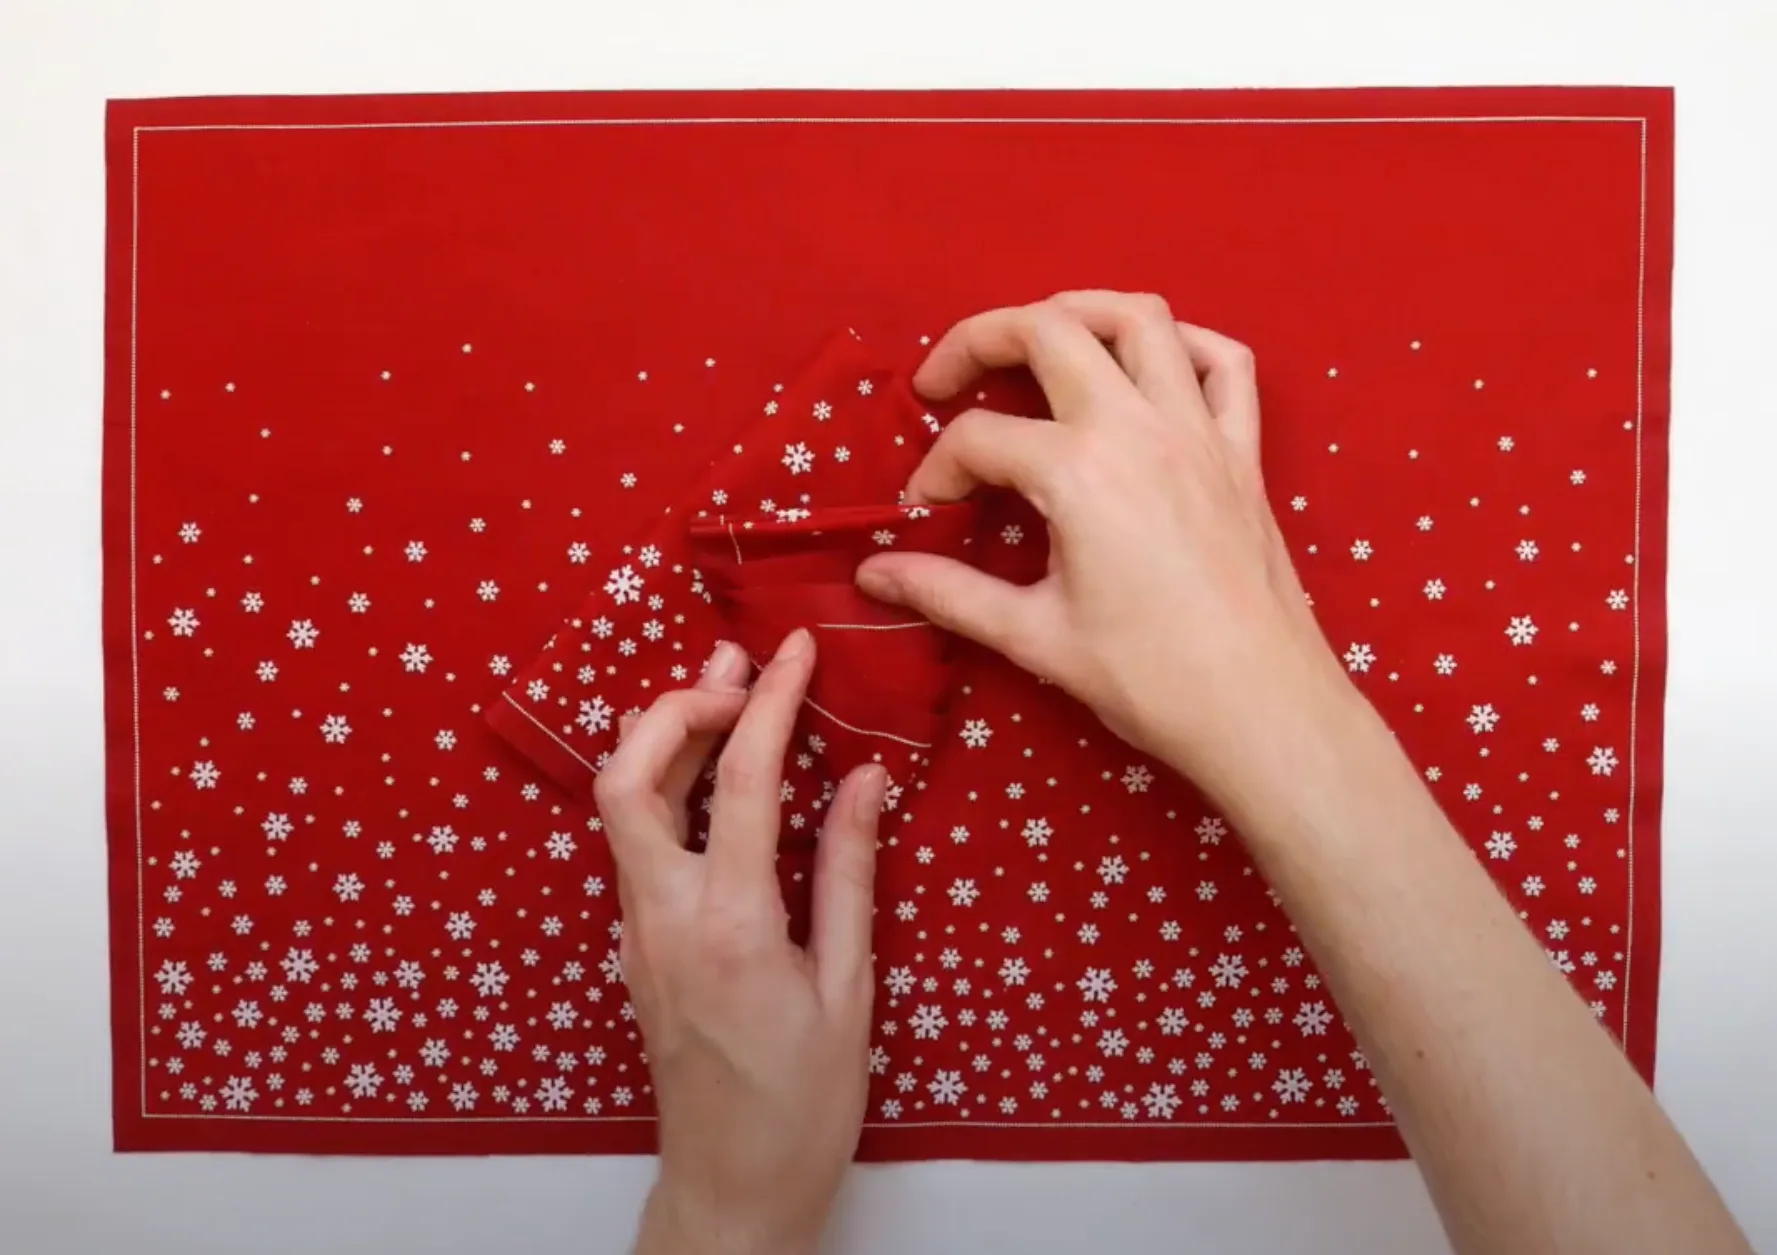
7- Turn the cotton napkin over again, so that the different layers and folds are visible, and with the narrowest point facing upwards. Starting from the top, fold the first layer (the most outward) with the point inwards.
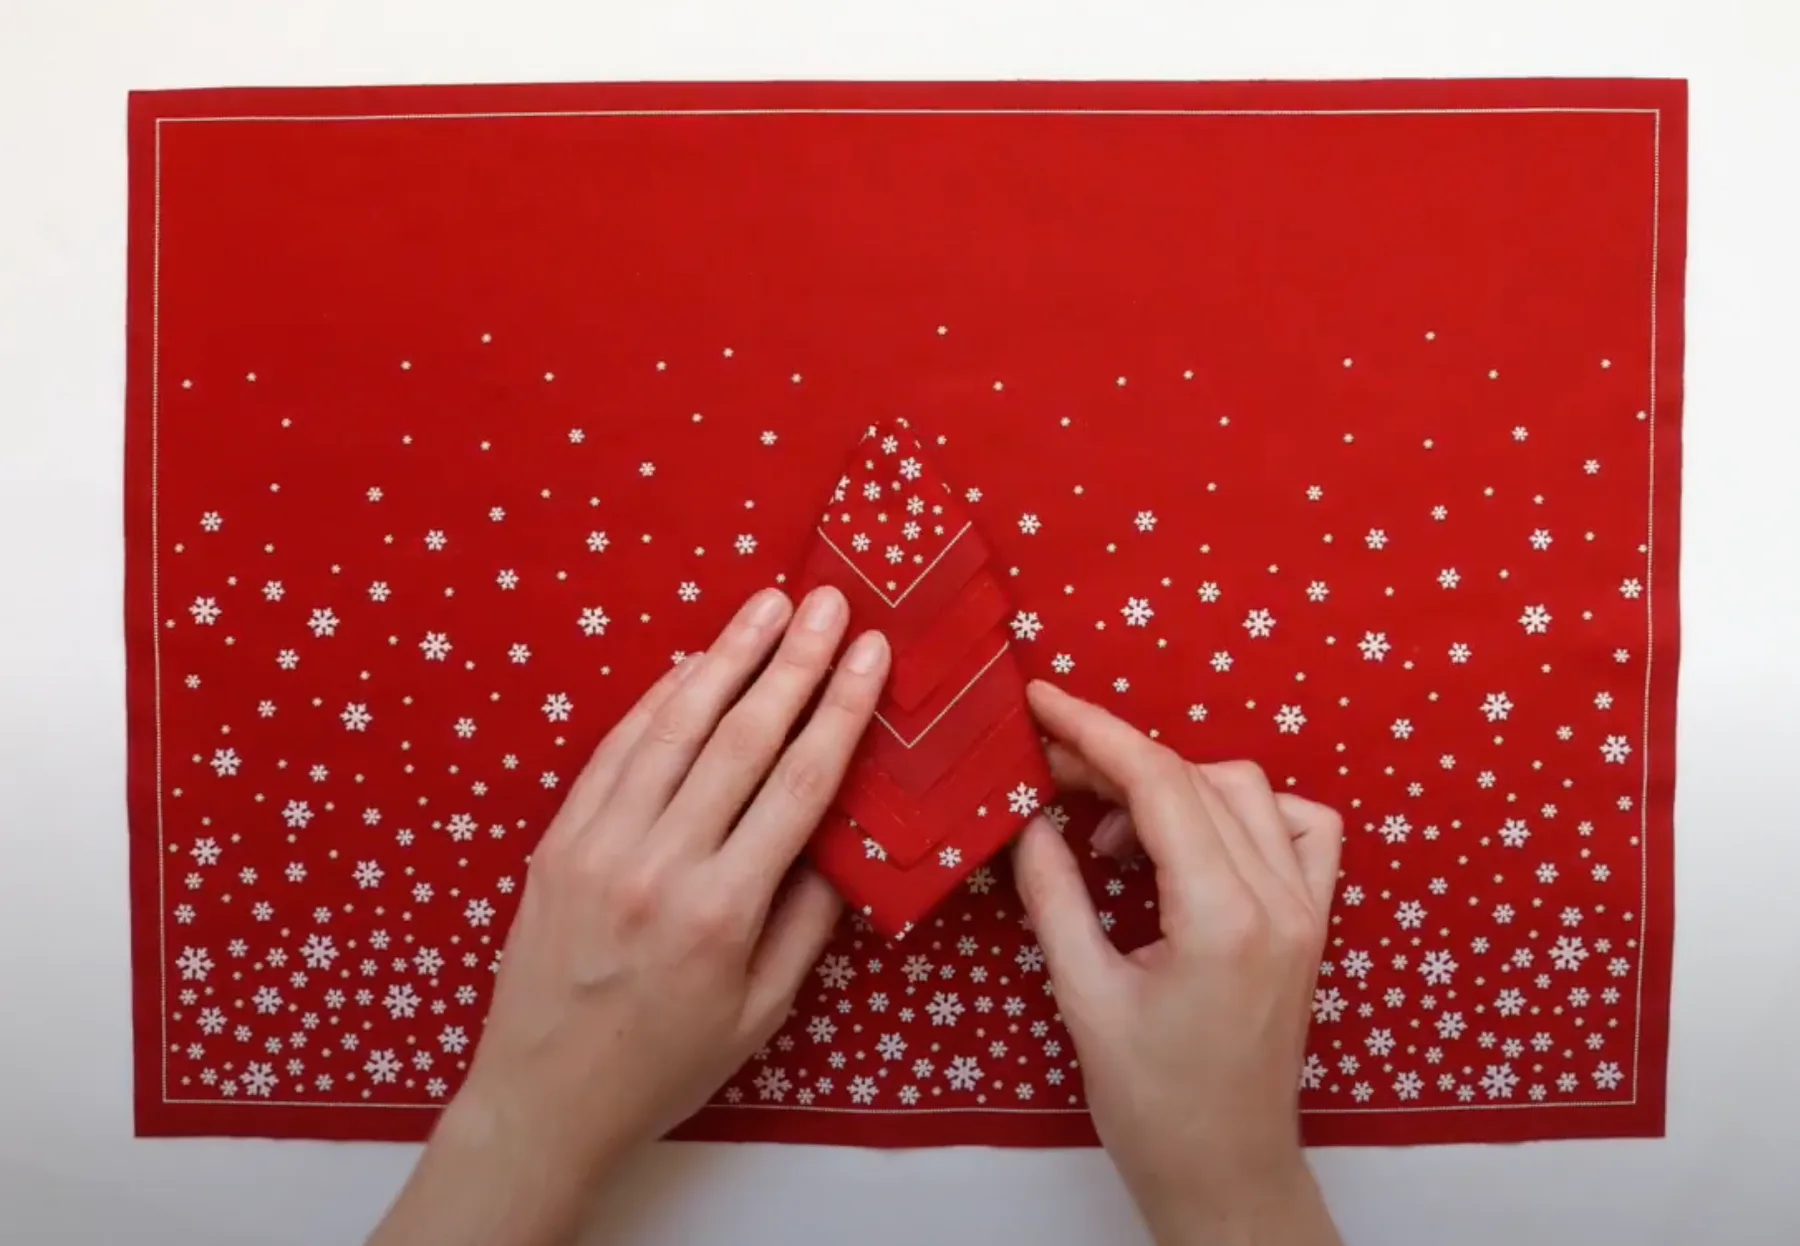
8- Take the second layer and fold it upwards, introducing the point into the pocket created by the previous layer.
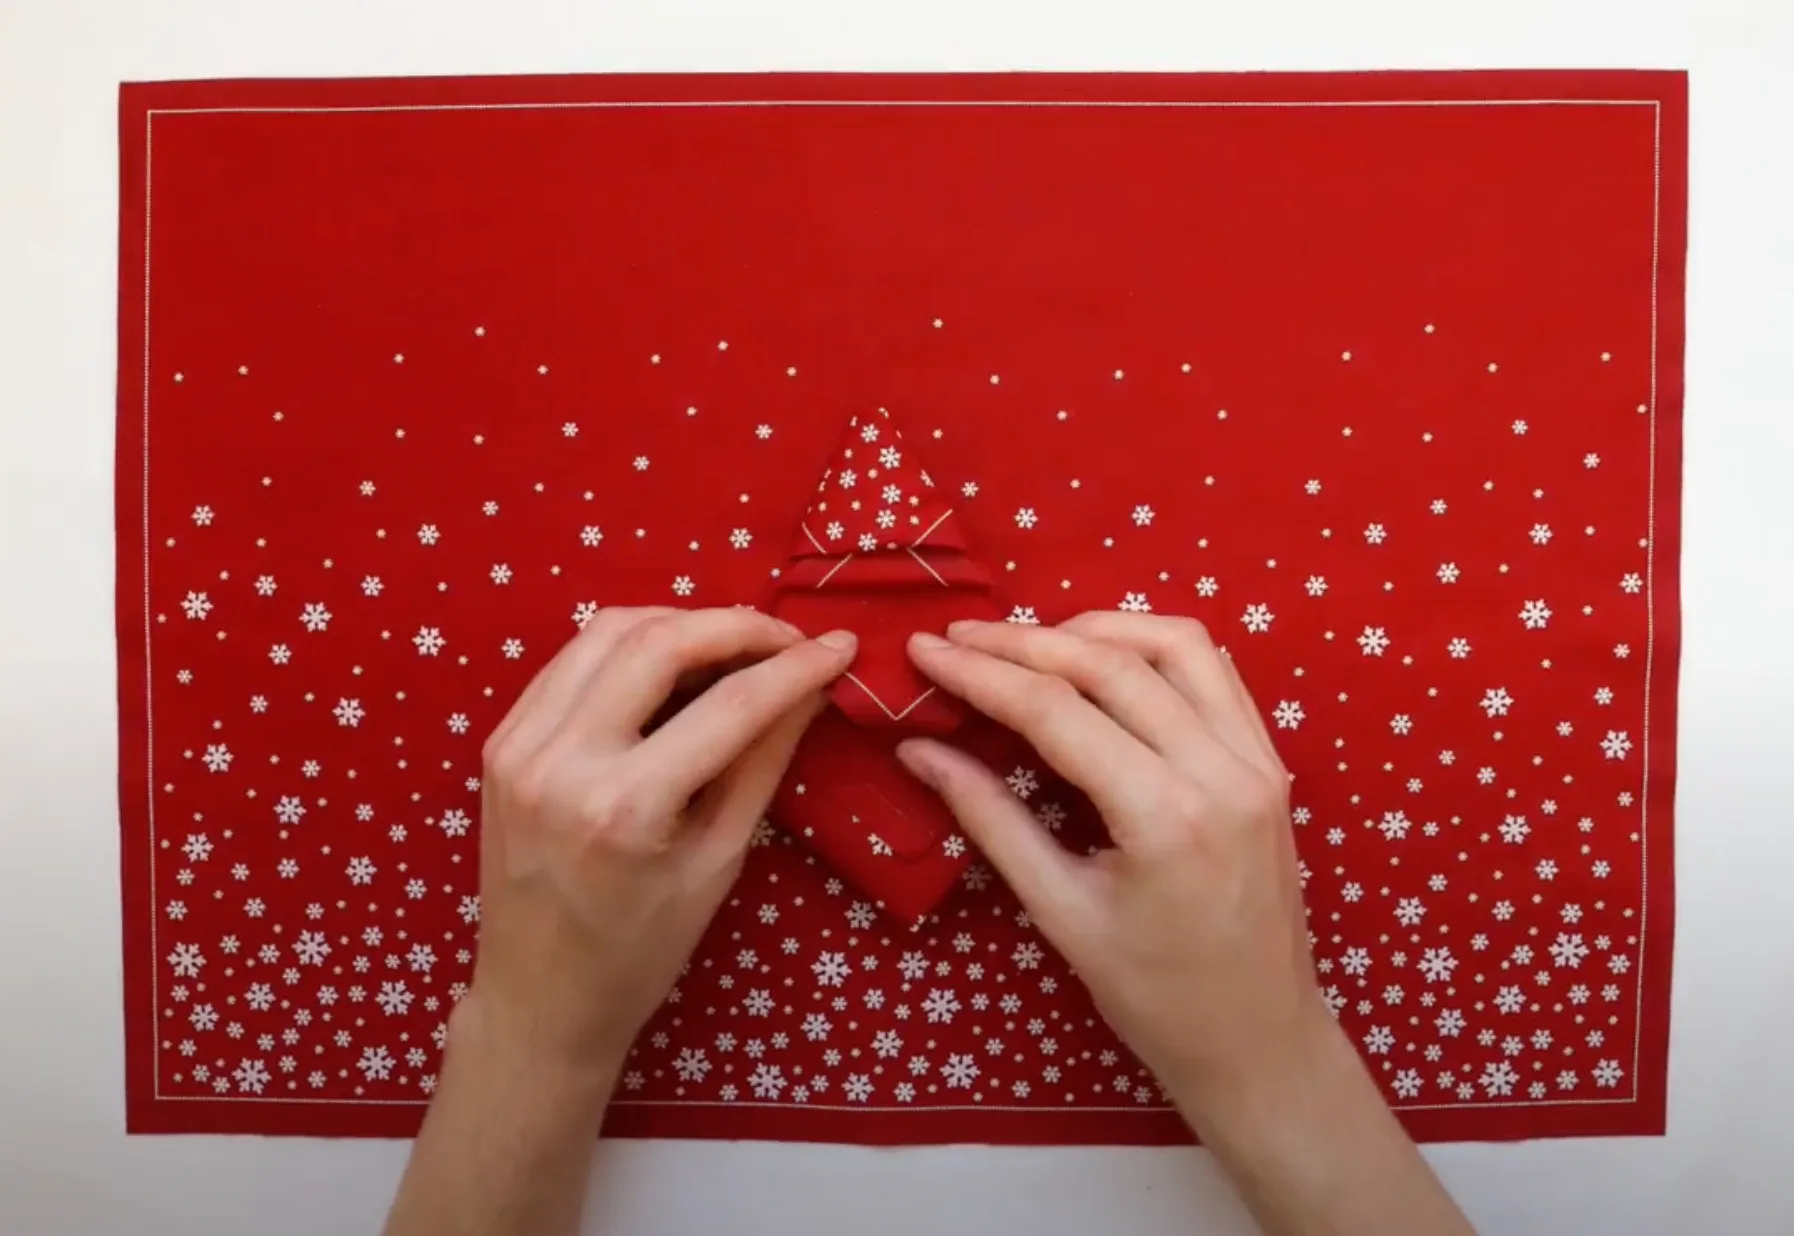
9- With the third layer we do the same as we did with the first: fold the point upwards and inwards.
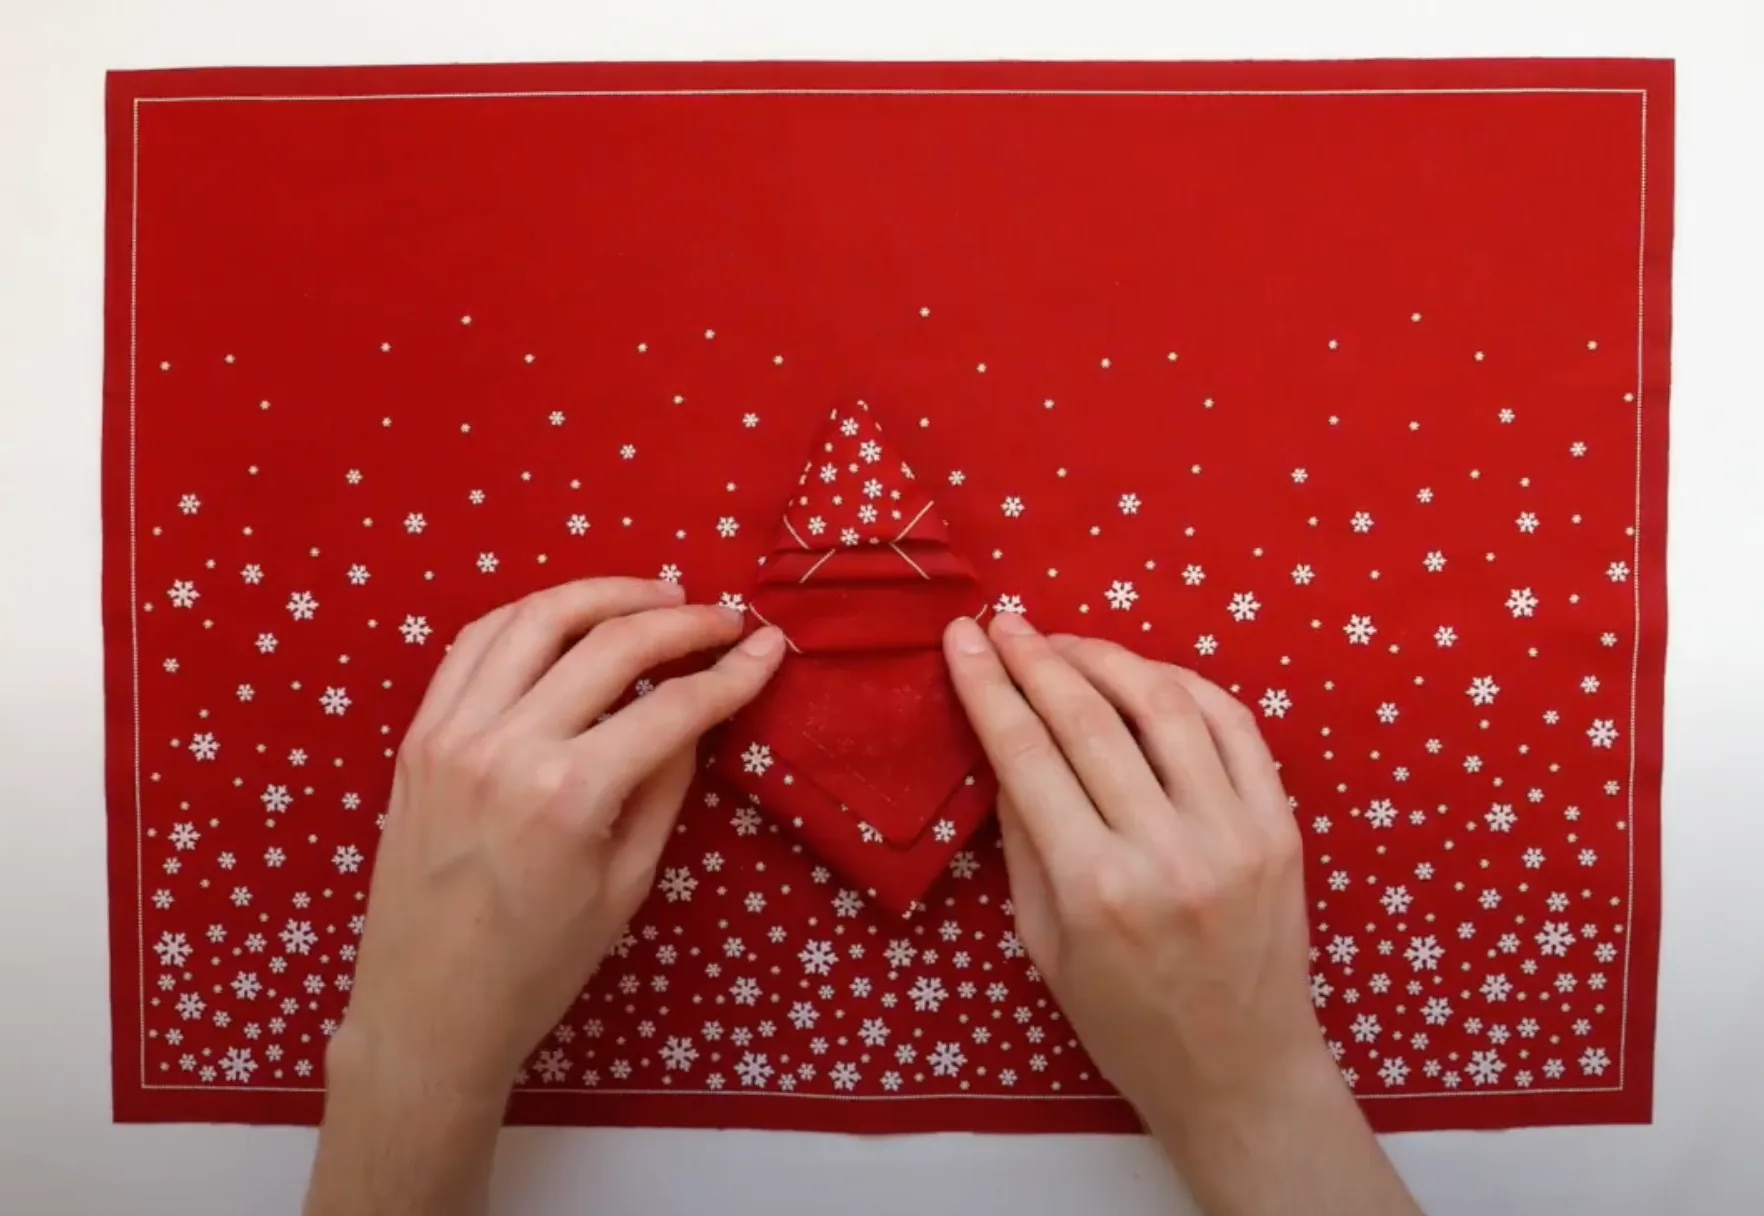
10- With the fourth layer we do the same as the second: fold it upwards, introducing the point into the pocket created by the previous layer.
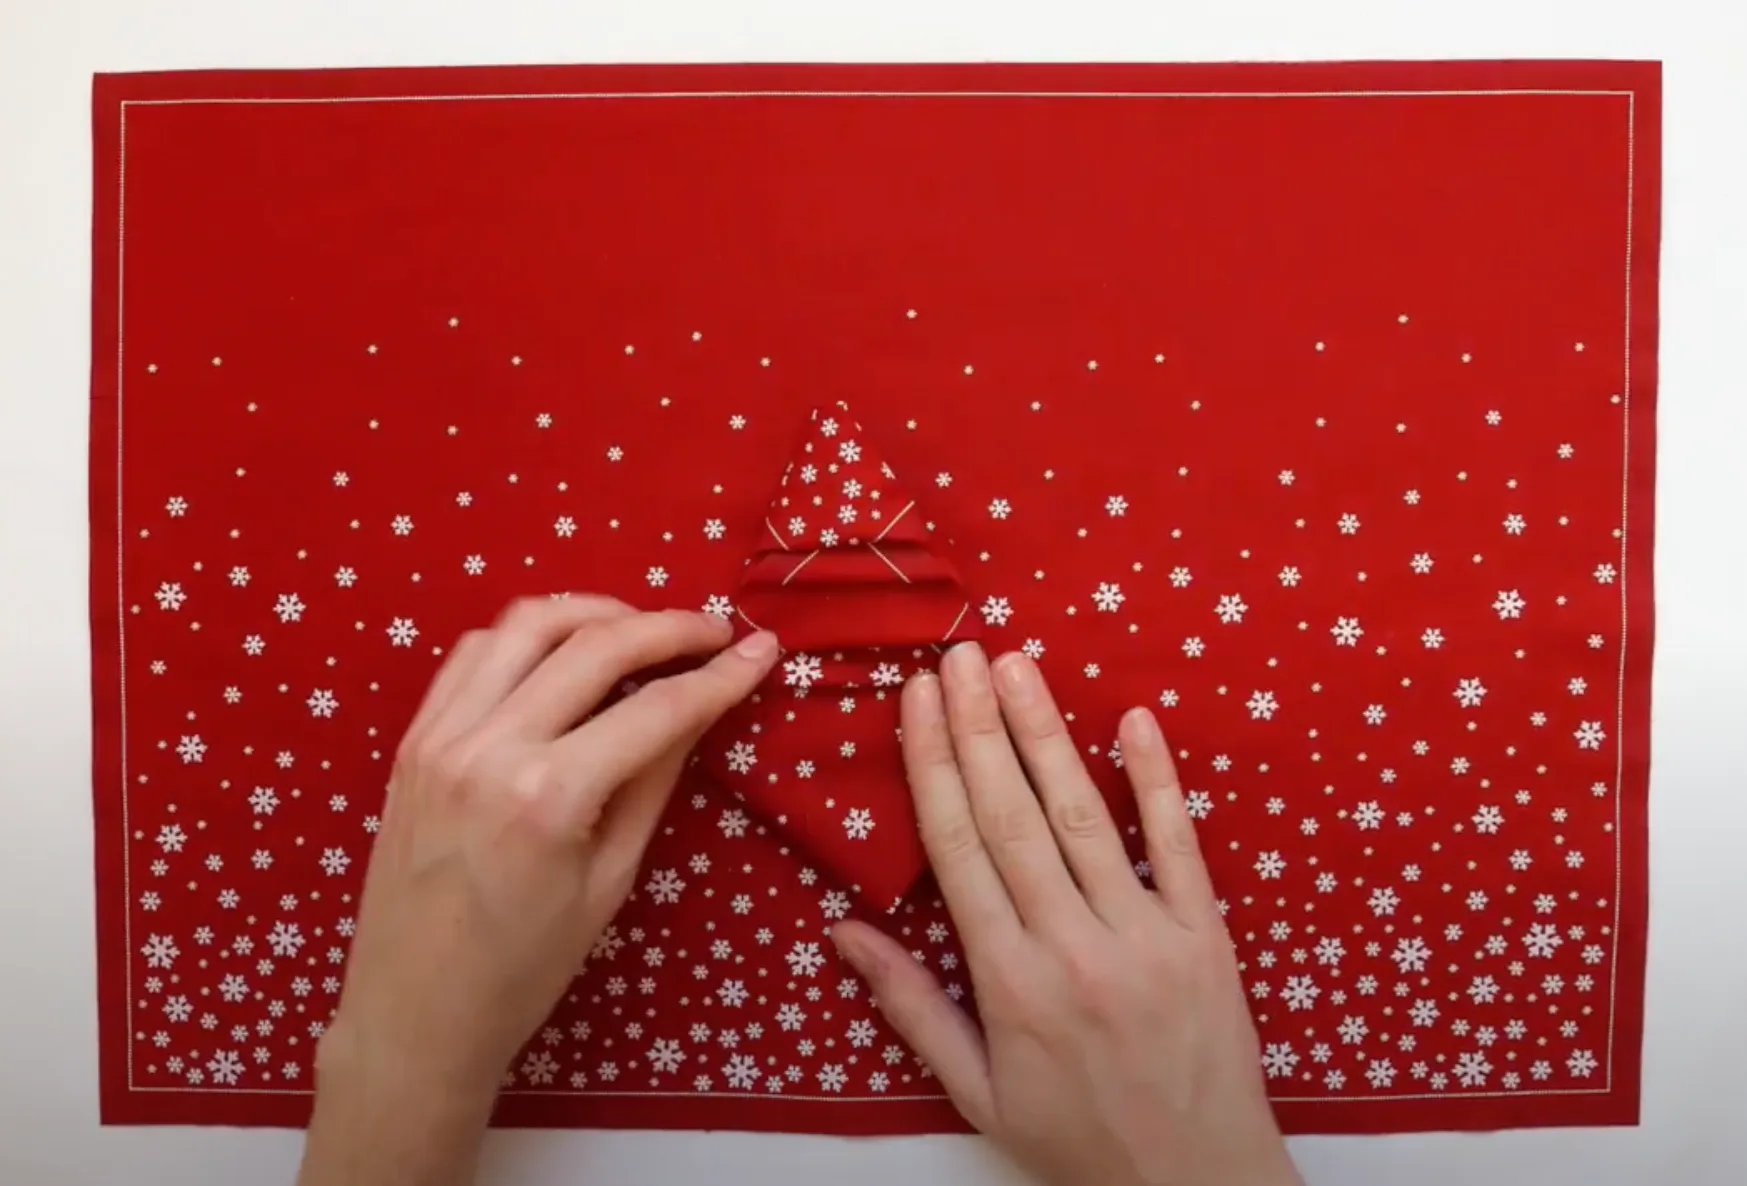
11- We repeat the movement with the final one, also folding it upwards and inside the previous pocket.
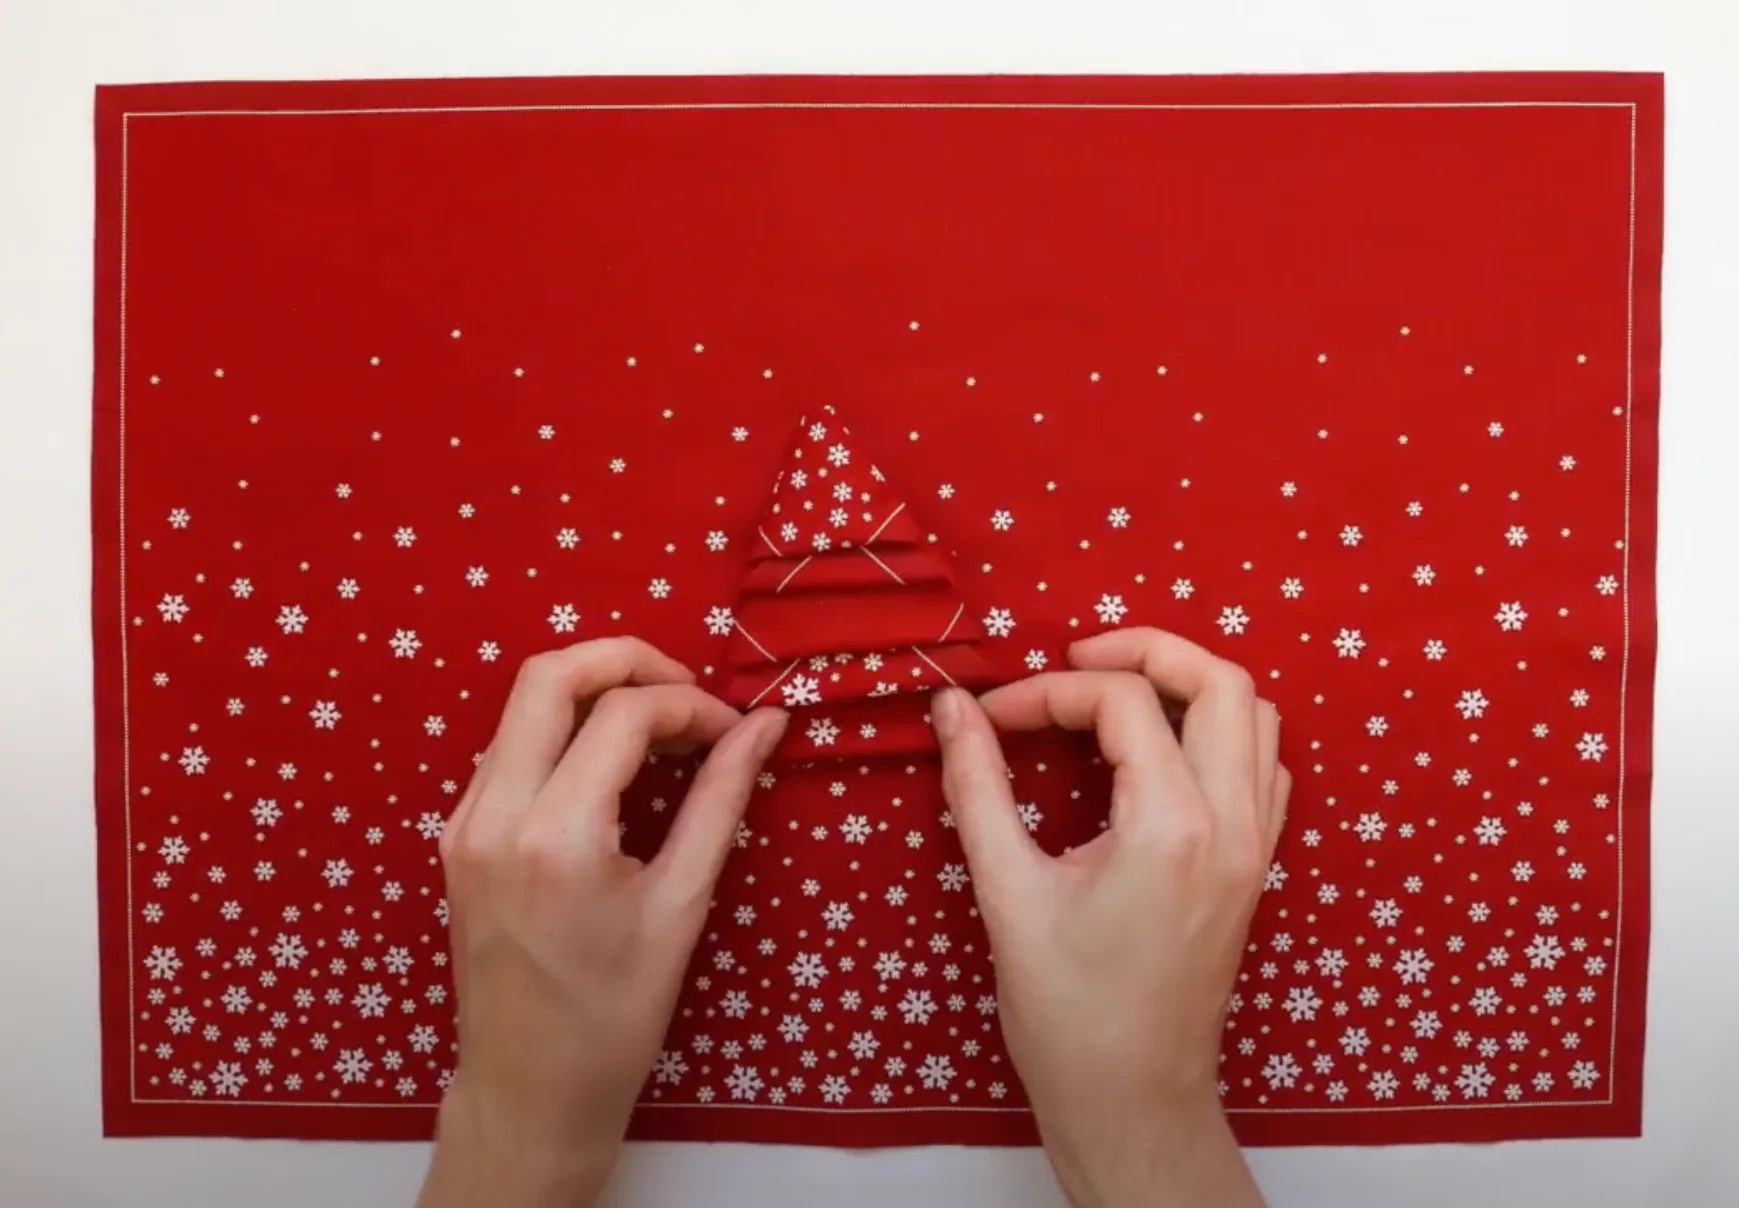
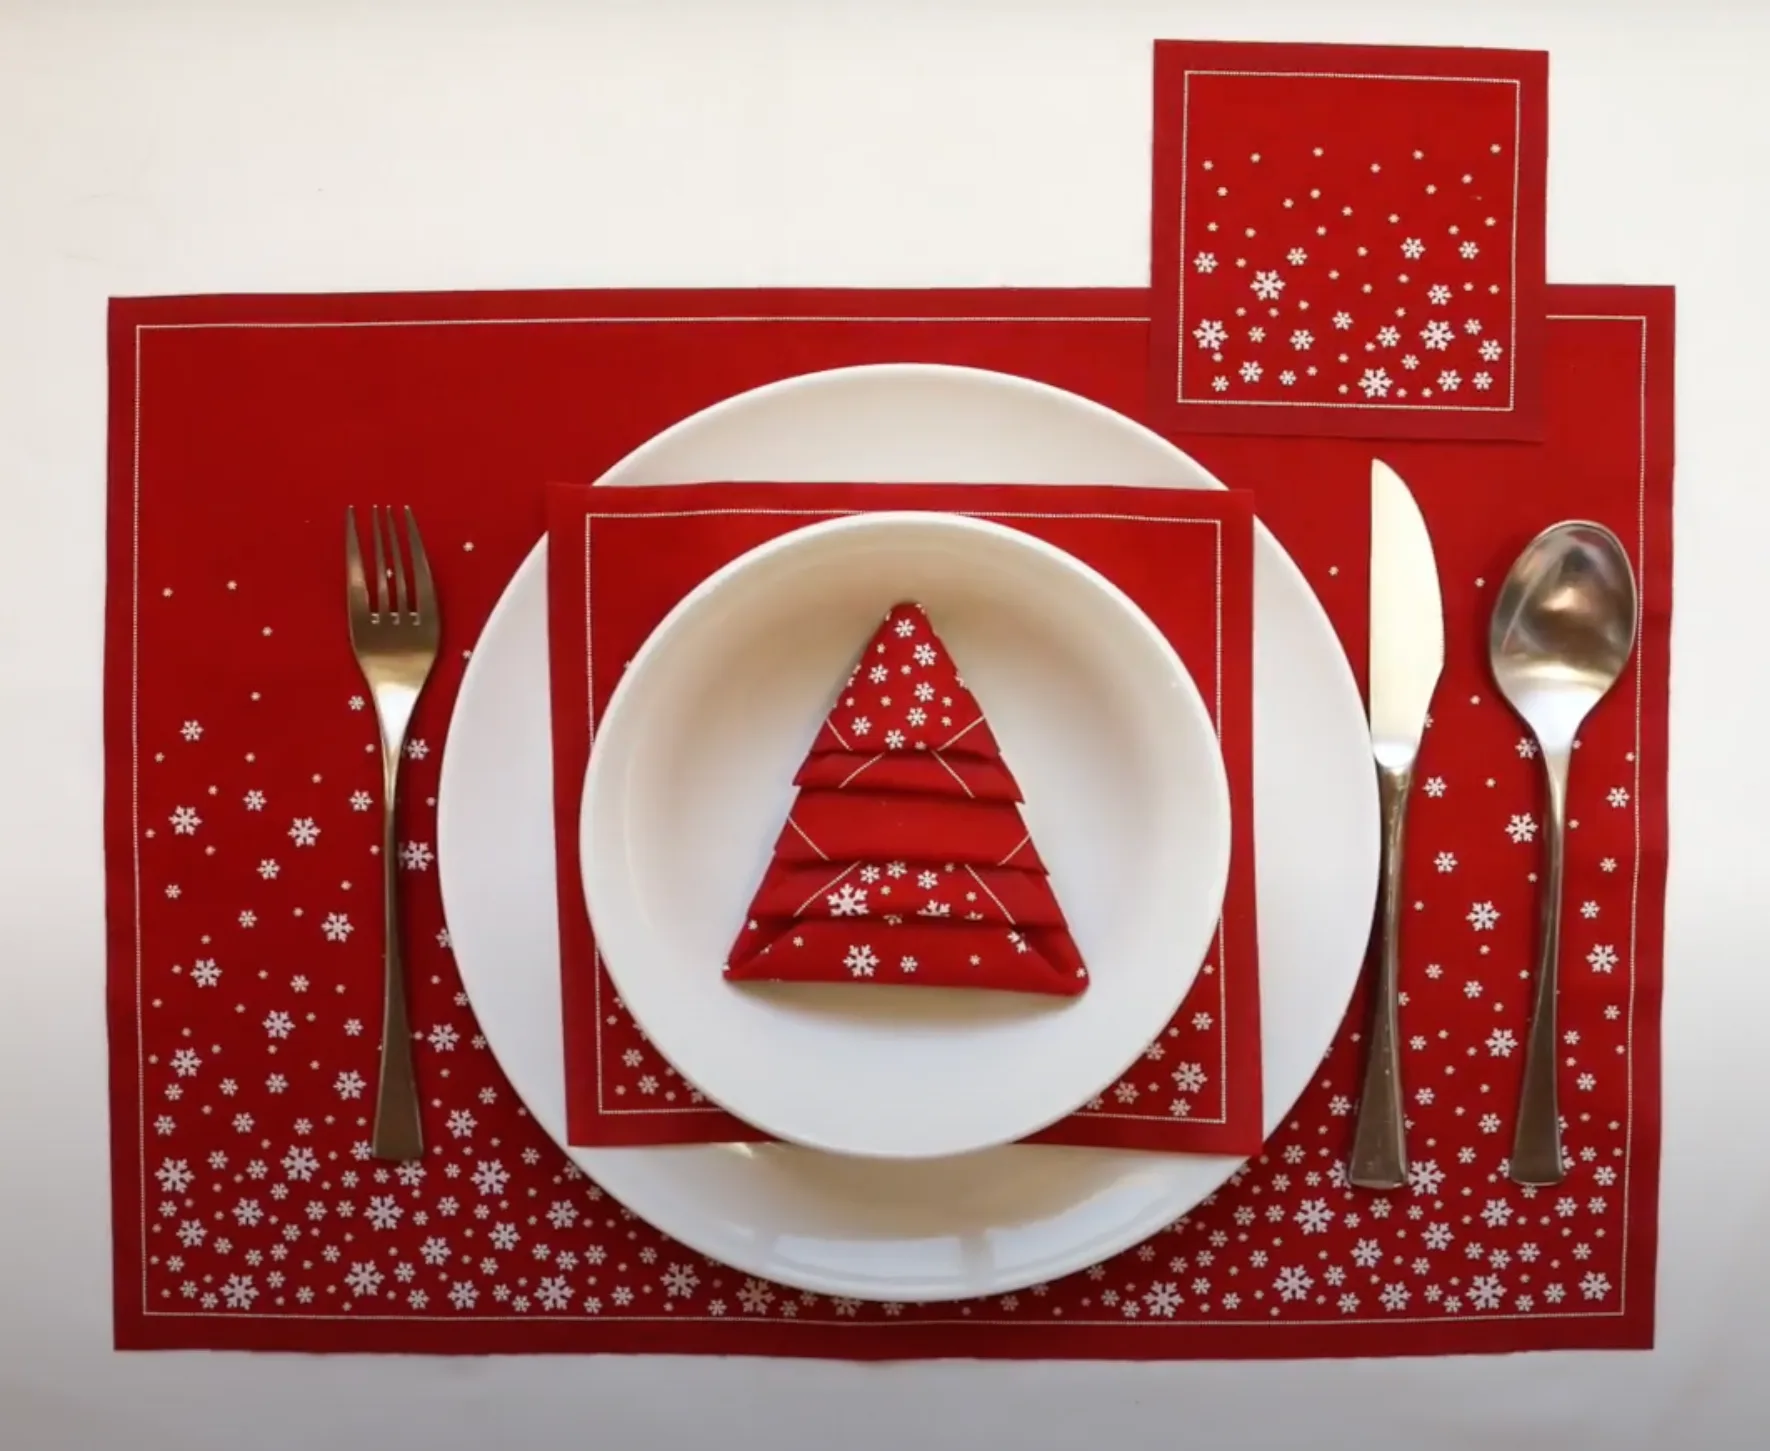
12- We have created a fantastic Christmas tree with a cotton napkin!
Step by step: how to fold cotton napkins for formal Christmas tables
To learn how to fold cotton napkins and turn them into surprising cutlery holders, follow the steps we outline for you below:
1- Place the cotton napkin in front of you, with the pattern facing upwards.
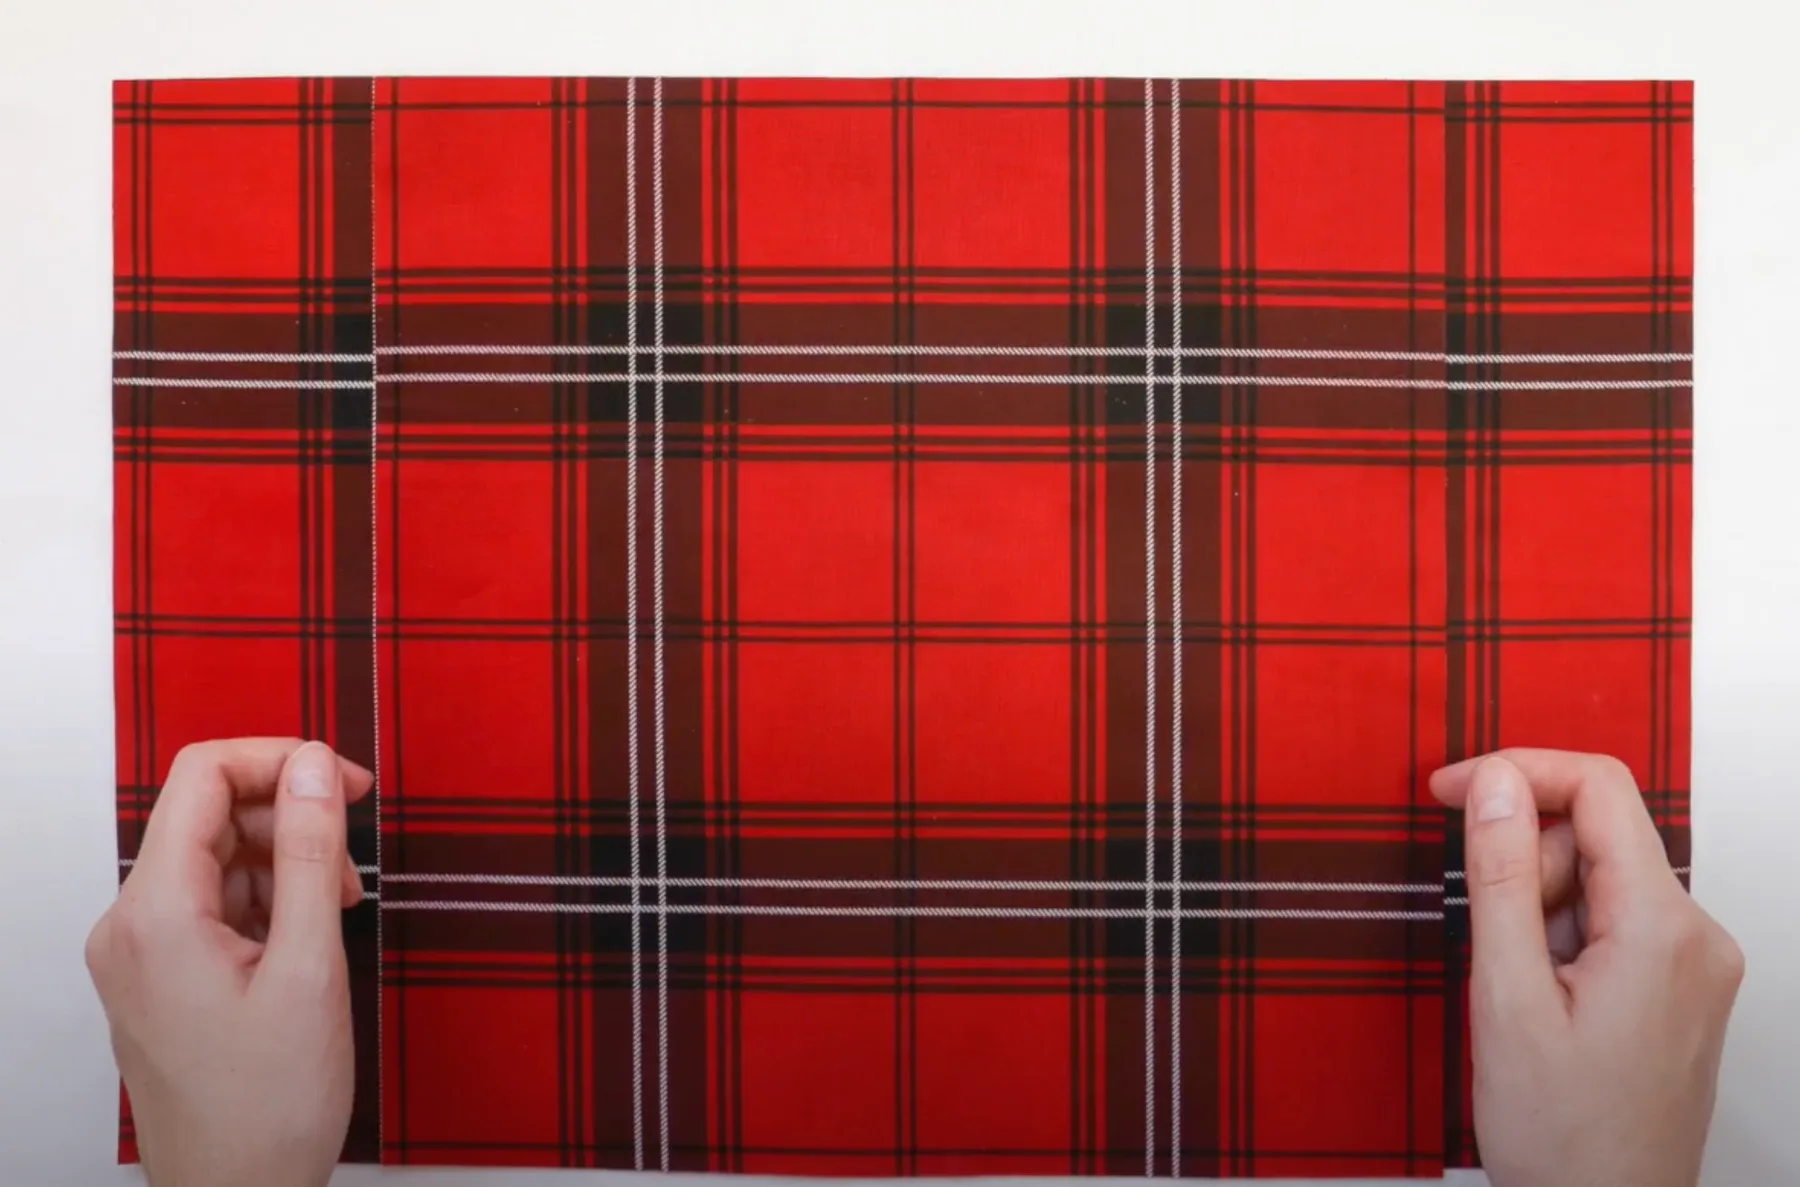
2- Fold the napkin in half, joining the lower corners with the upper ones. Fold the napkin in half again so that it is a square: fold the corners of the left end towards the corners of the right side.
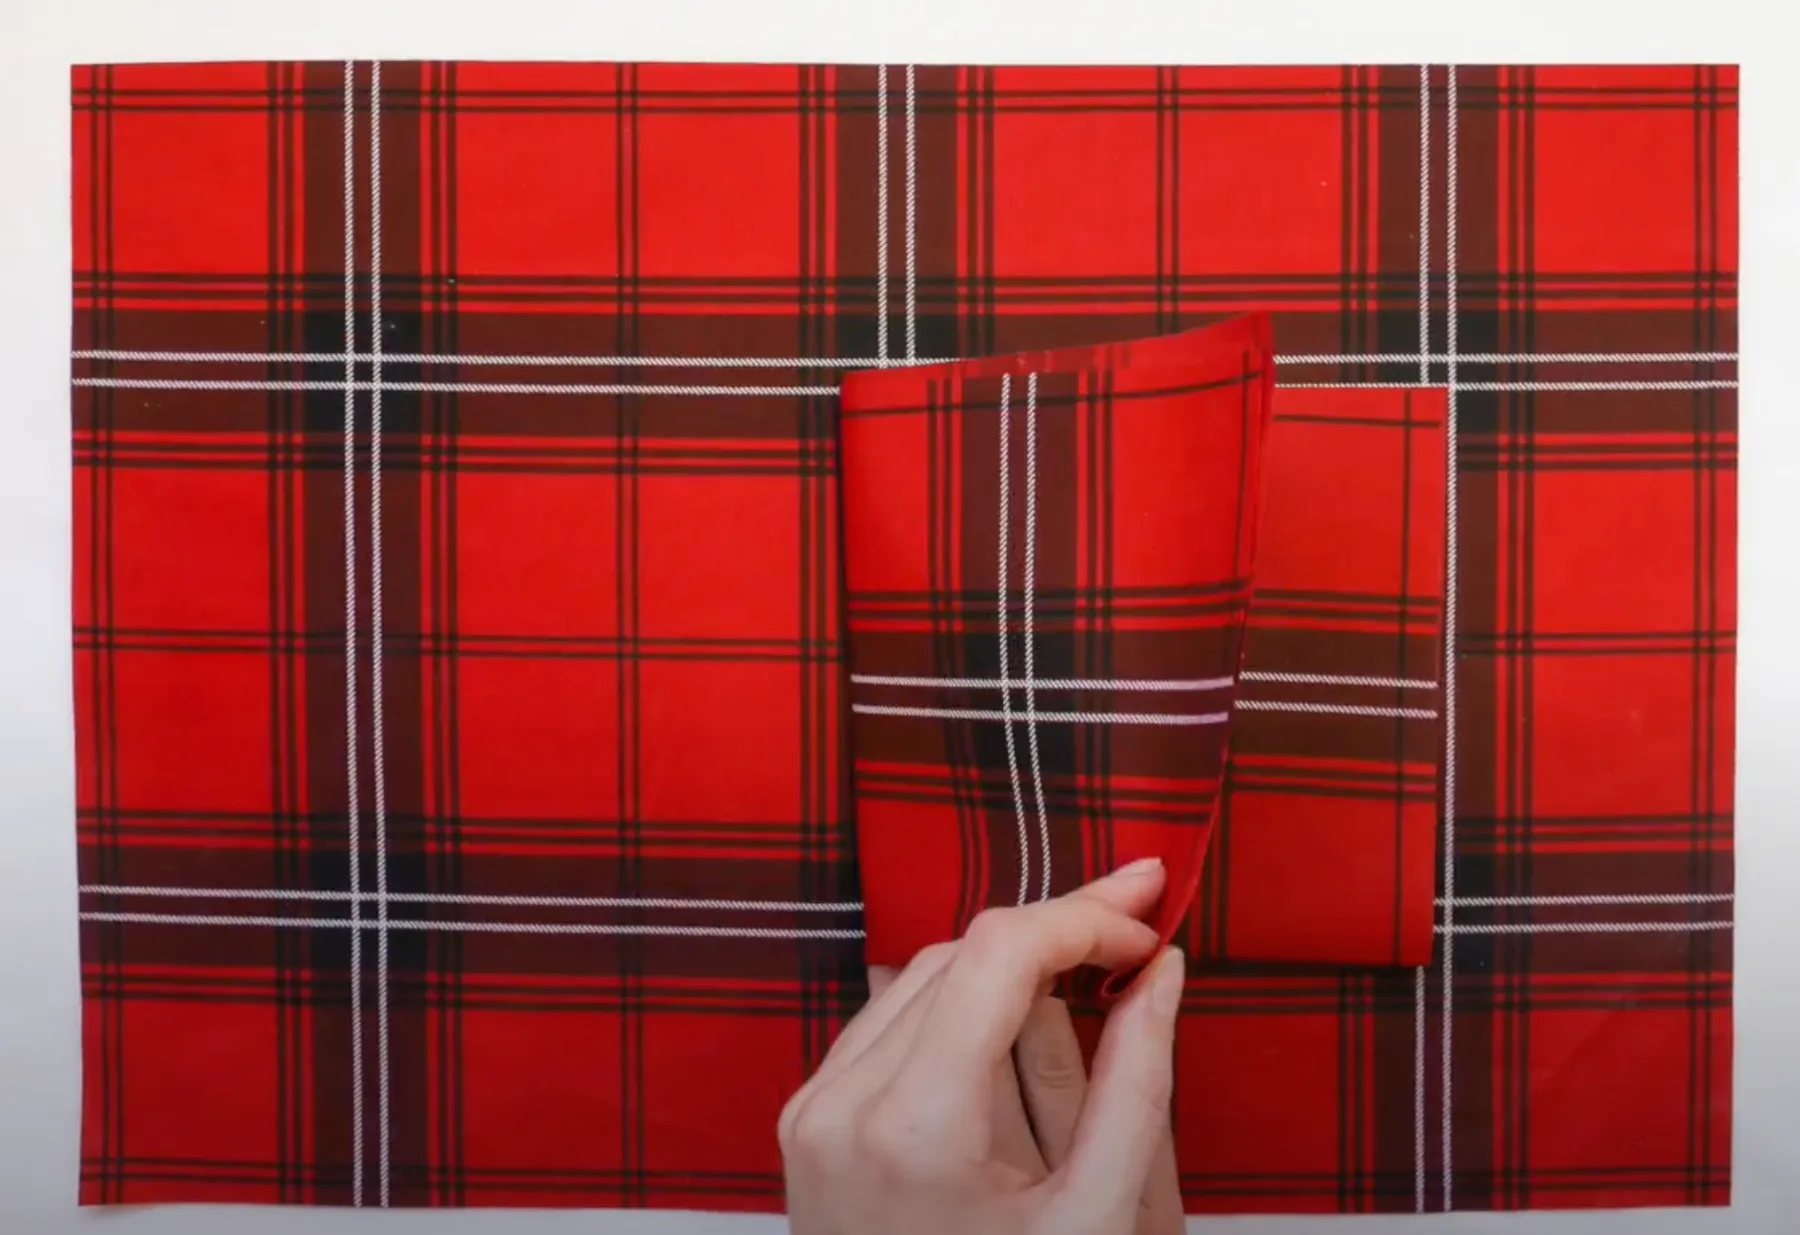
3- Position the cotton napkin in the form of a rhomboid. This time, the open sides must remain in the upper ends. From the first layer of the cotton napkin (the most outward), take the upper corner and fold it downwards, without it touching the lower corner.
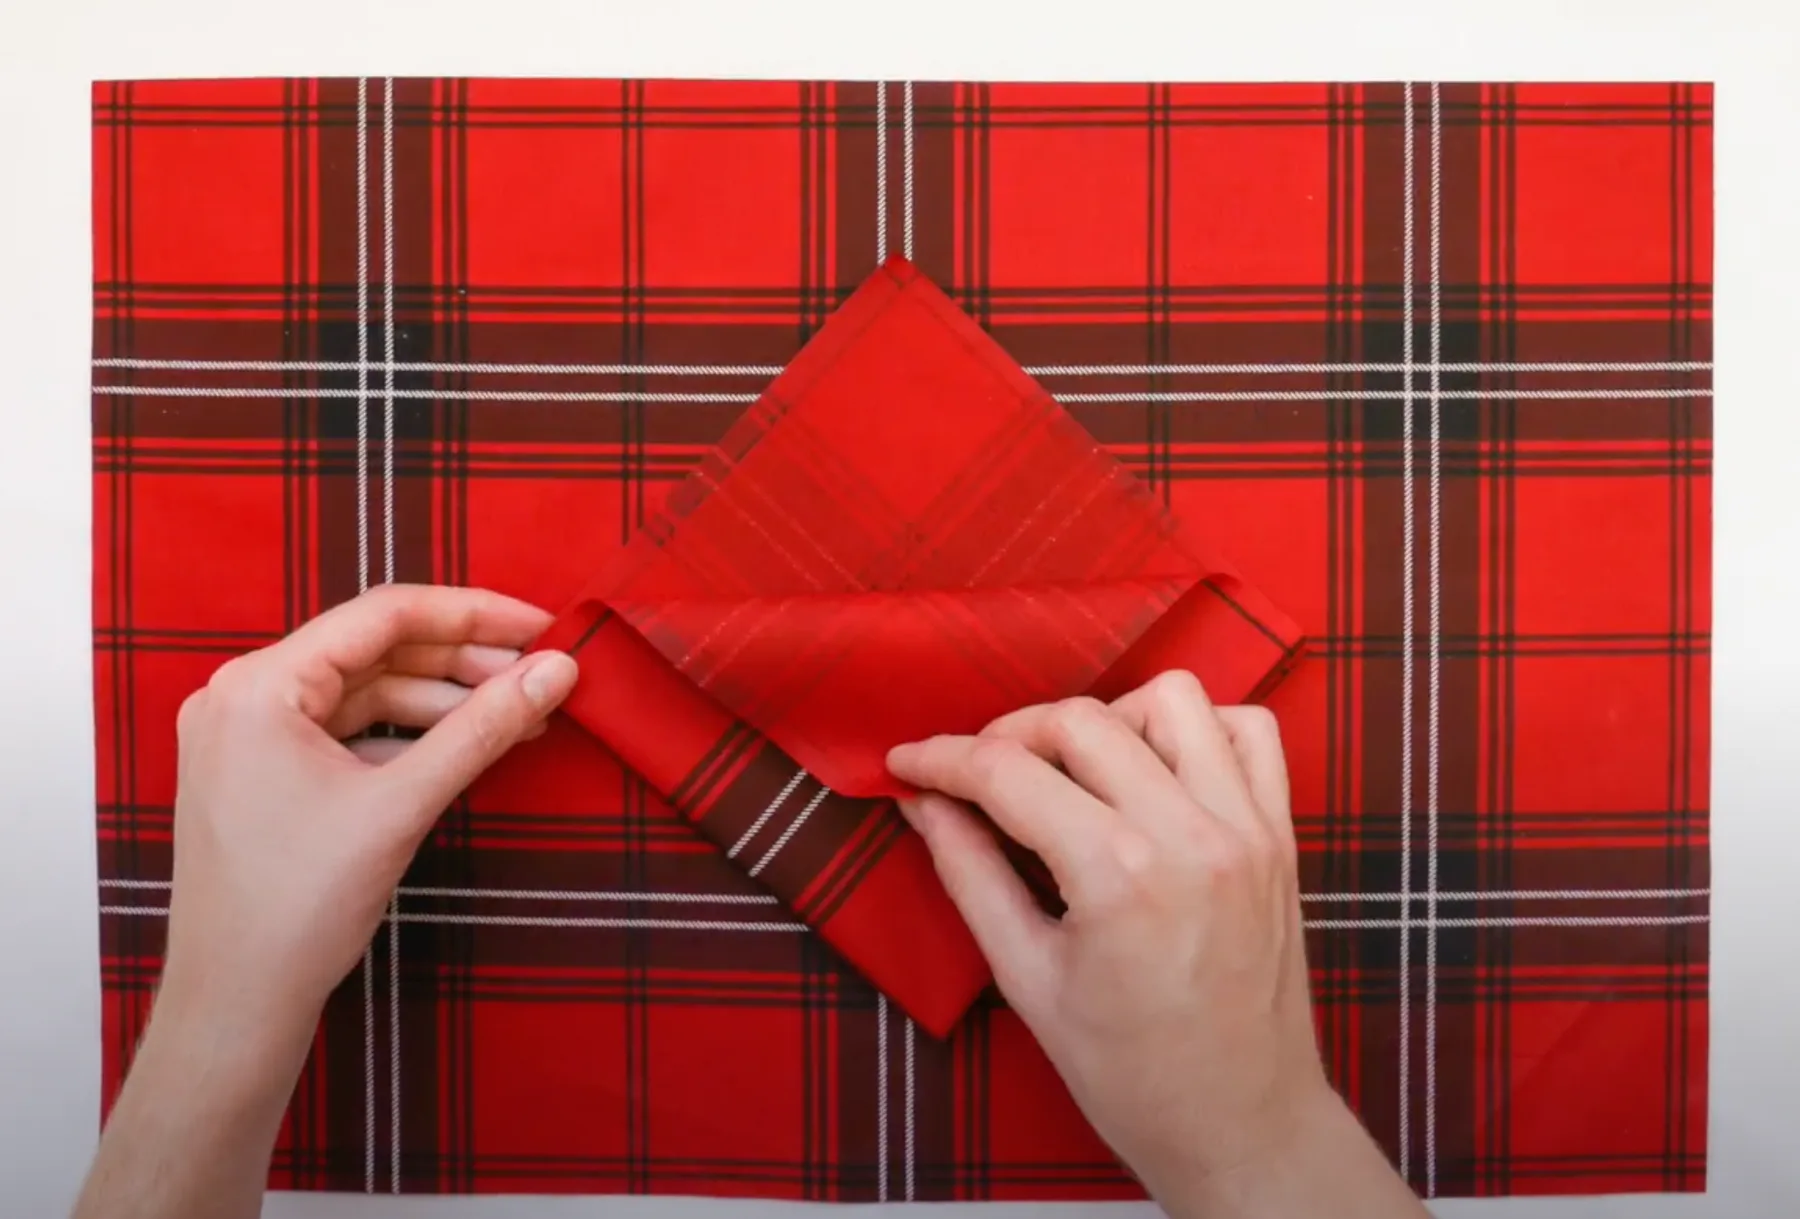
4- Now with the second layer of the cotton napkin, take the upper corner towards the centre of the cotton napkin (below the previous fold).
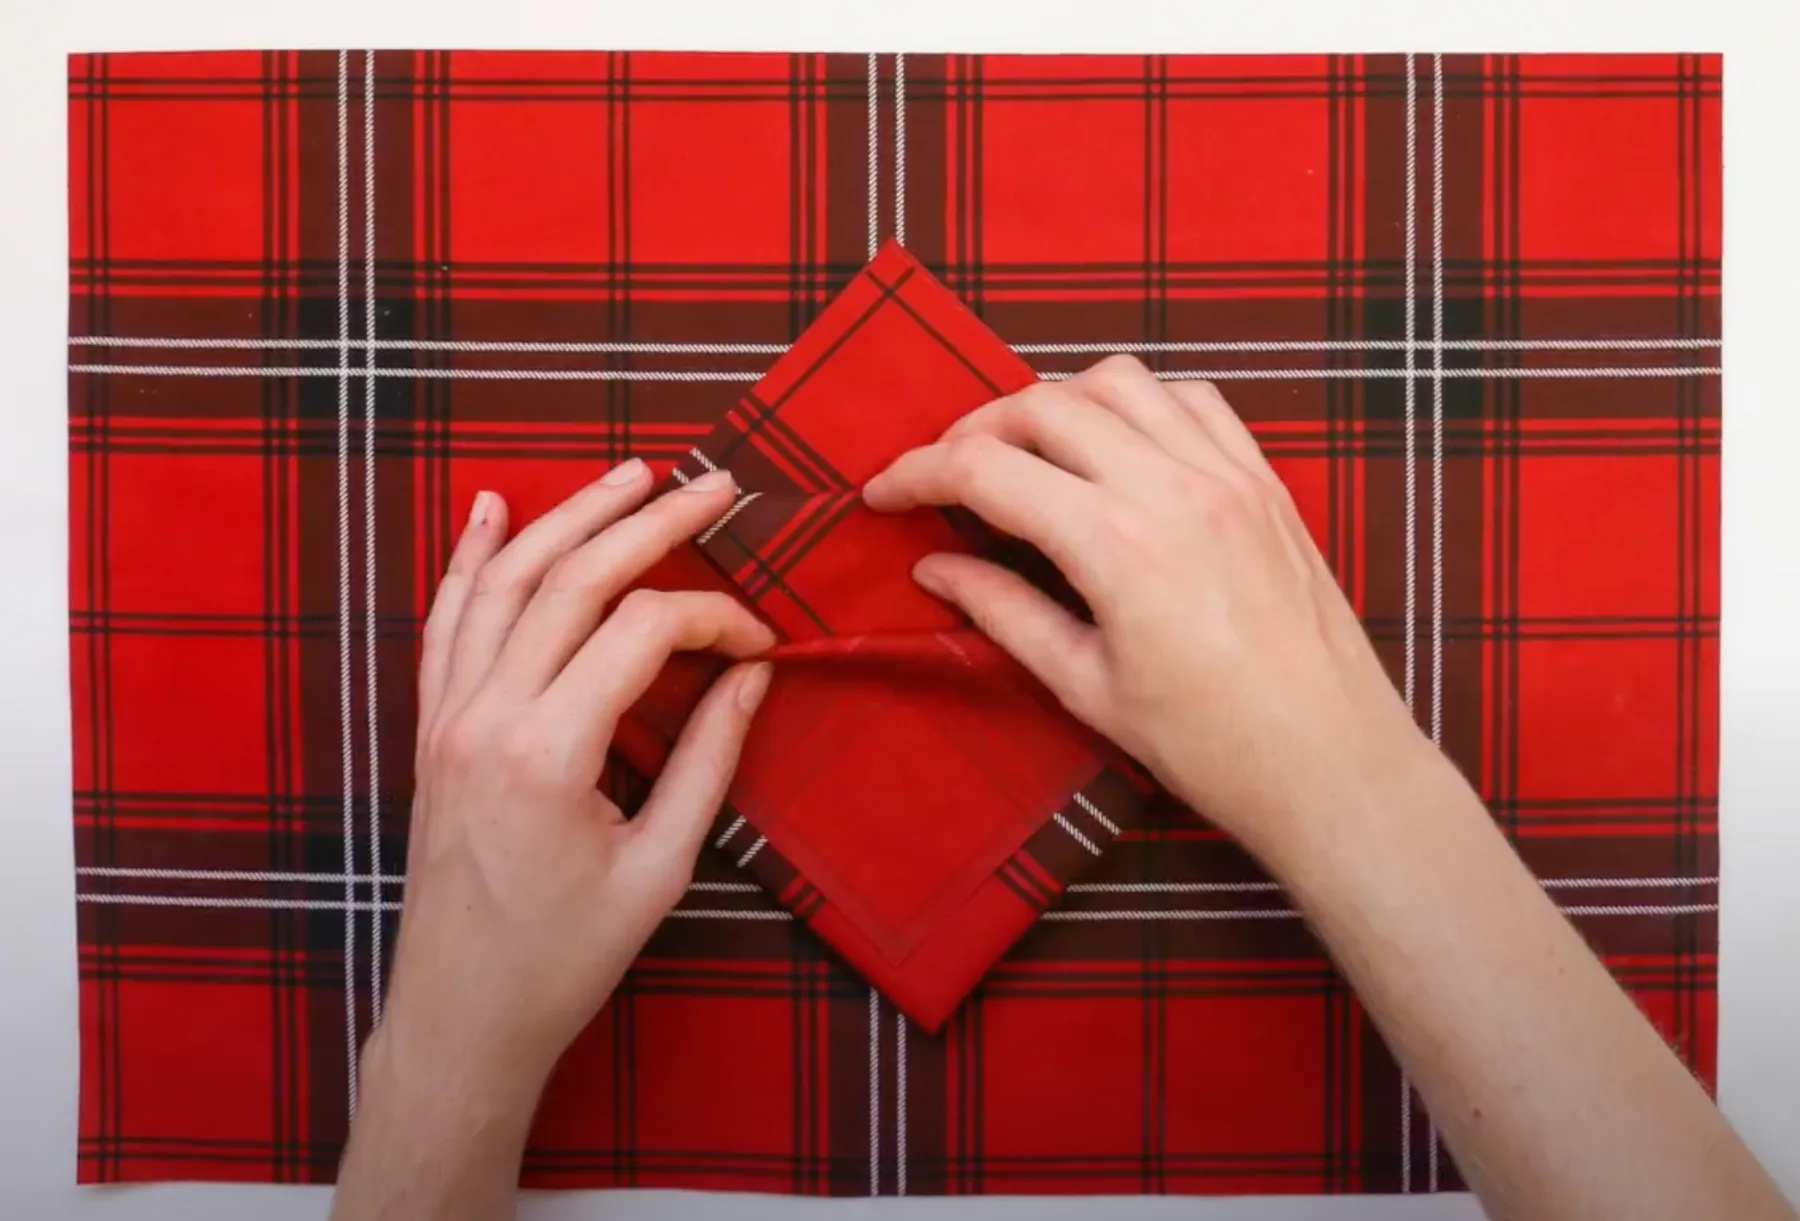
5- We go back to the first layer: take the lower corner, also folding it towards the centre of the cotton napkin.
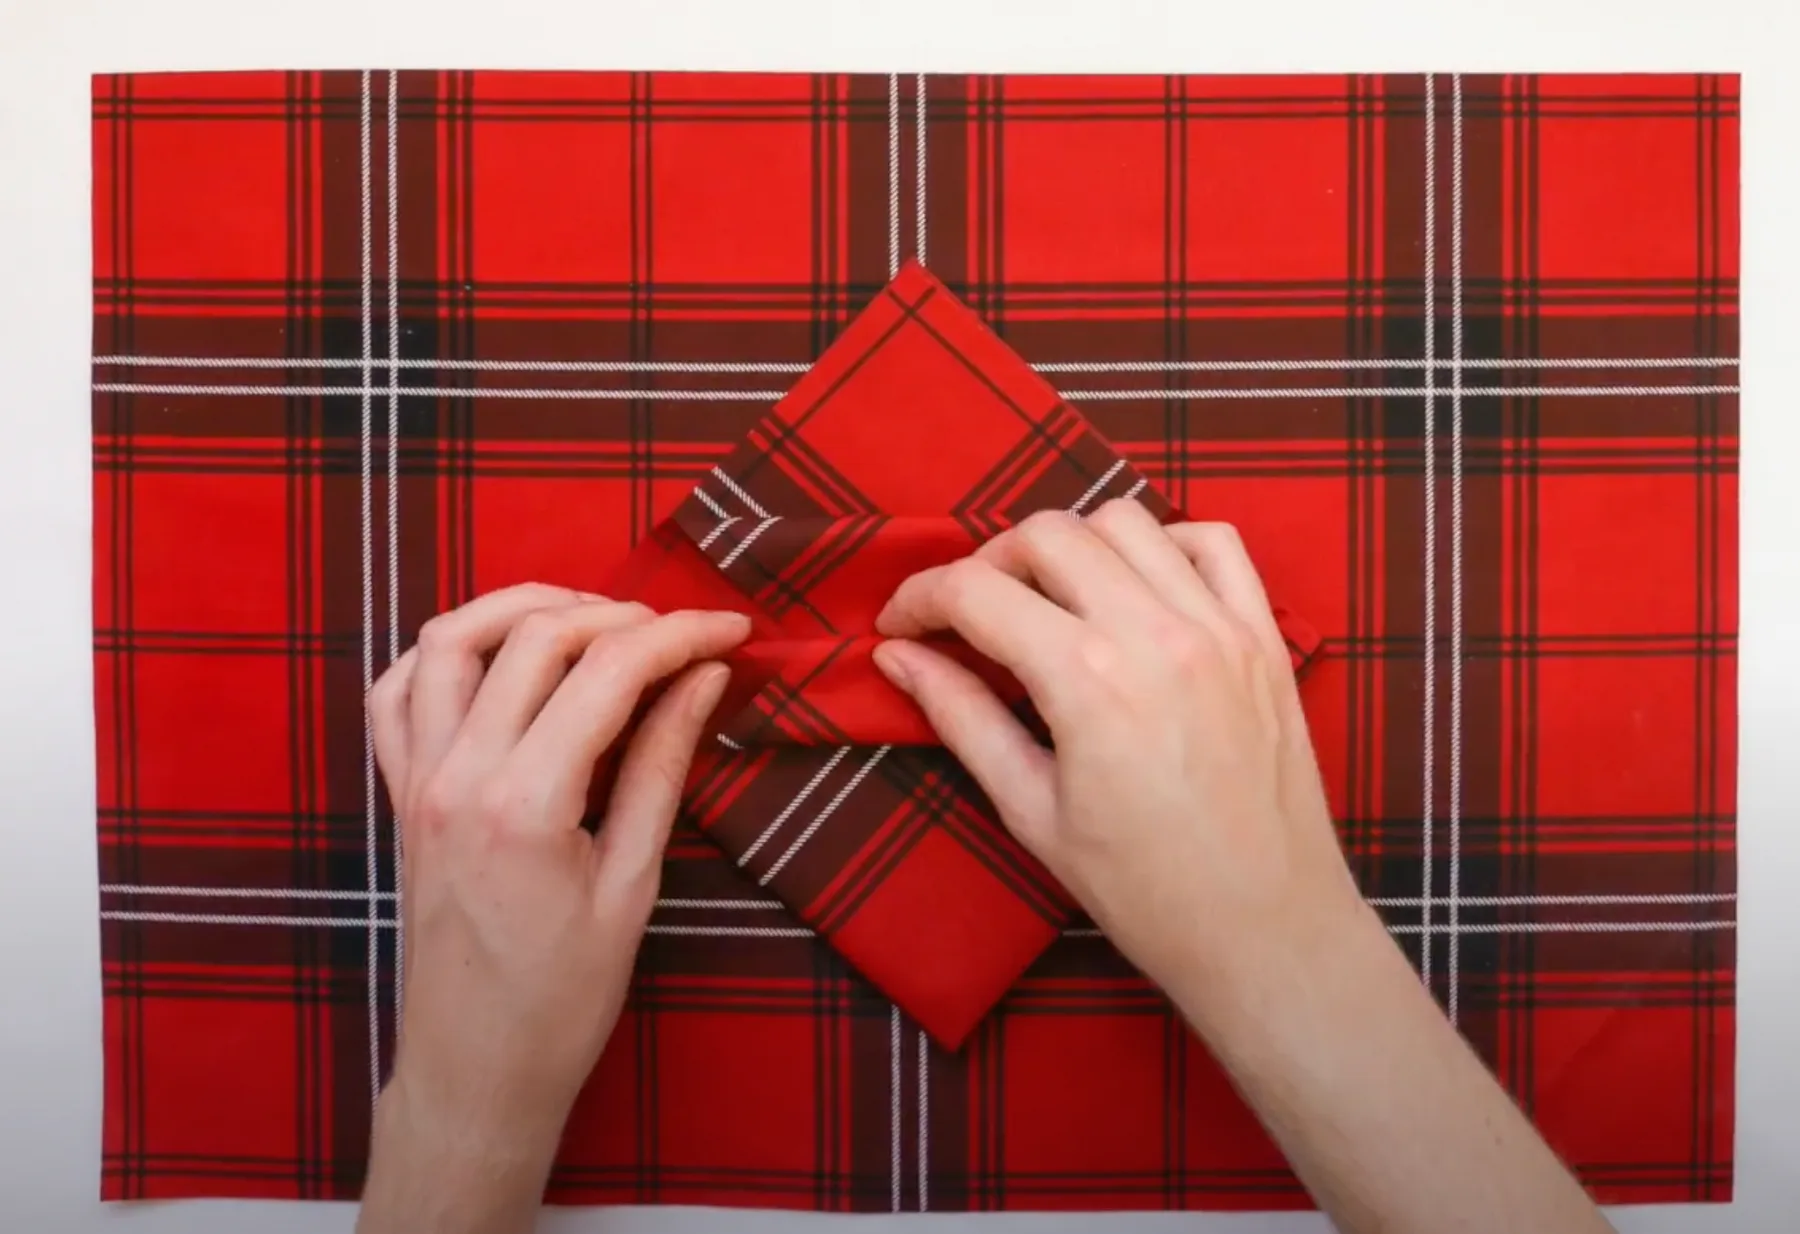
6- Take the upper fold and fold it over the other.
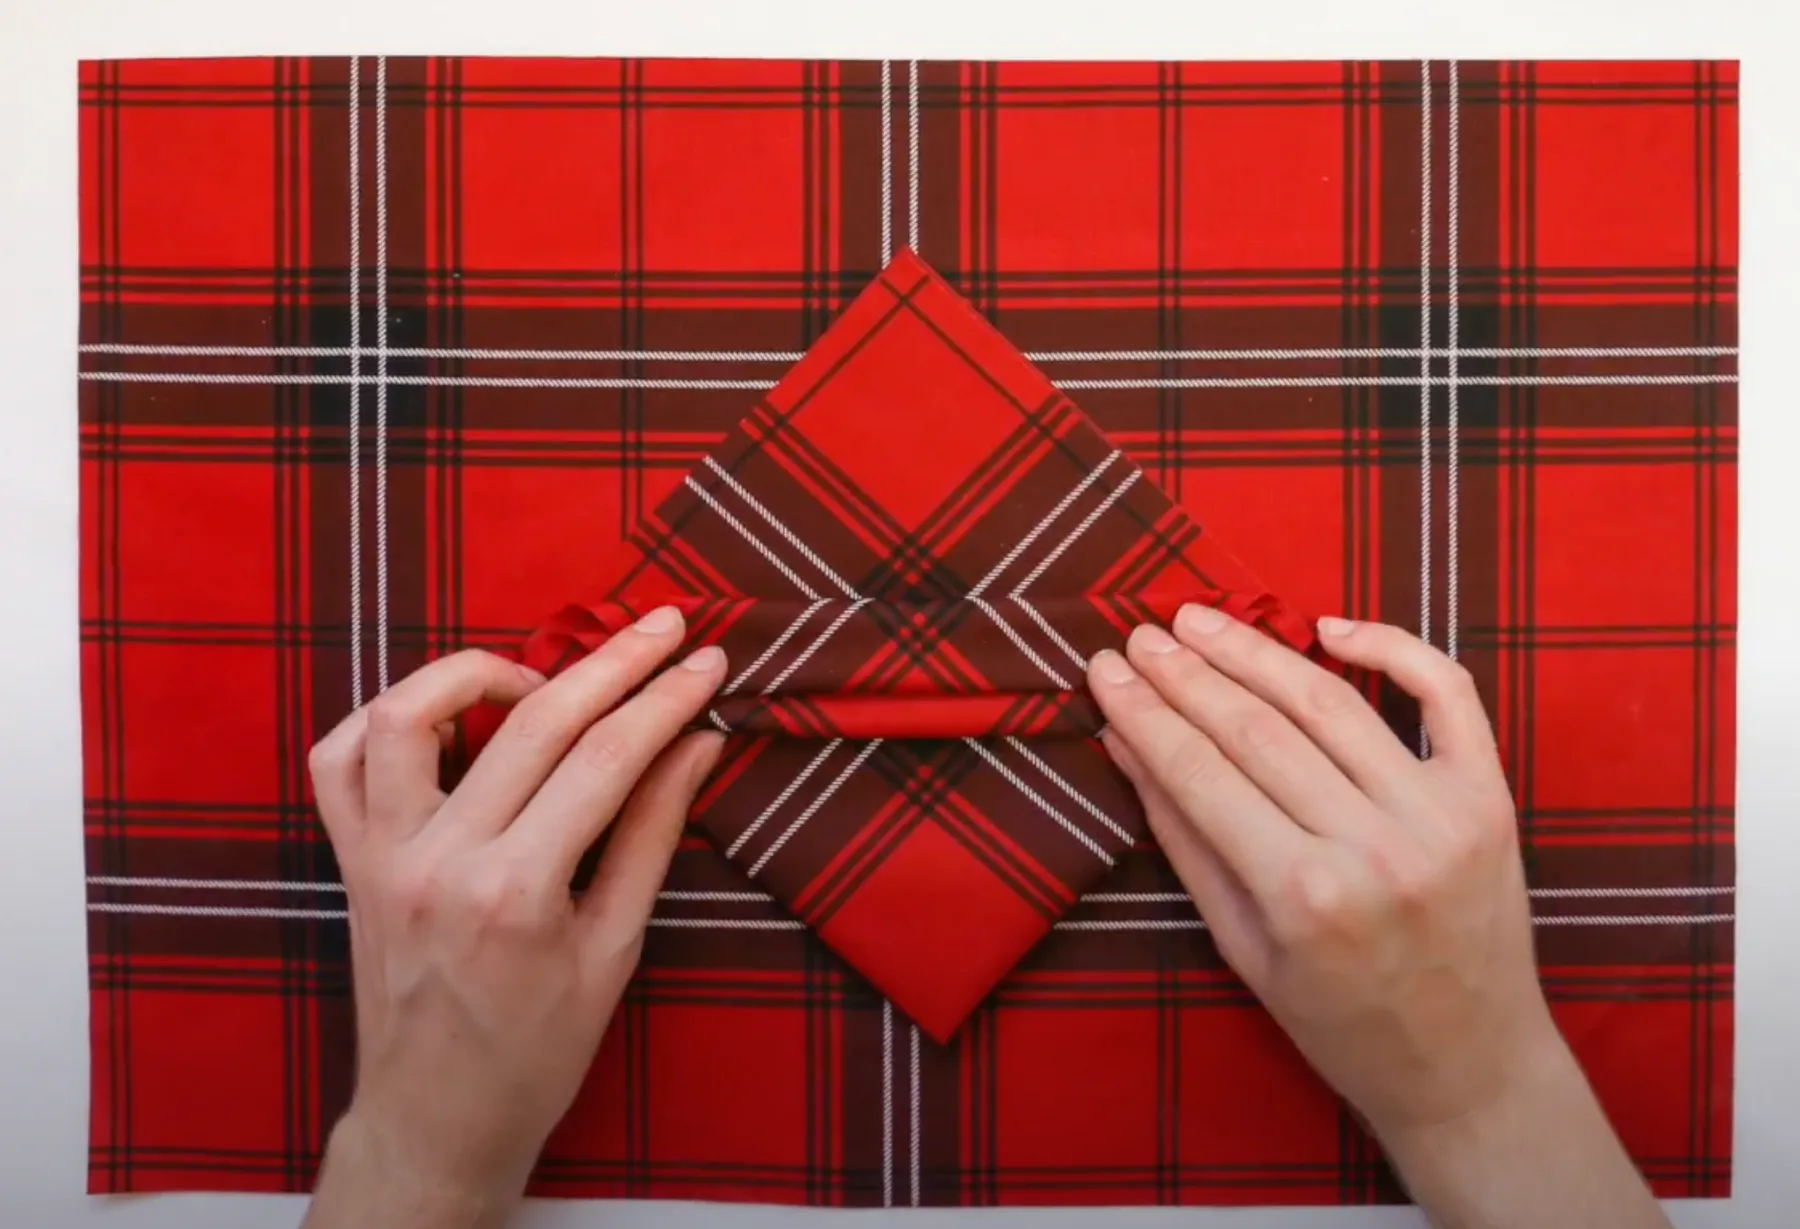
7- Fold behind the right corner of the cotton napkin.
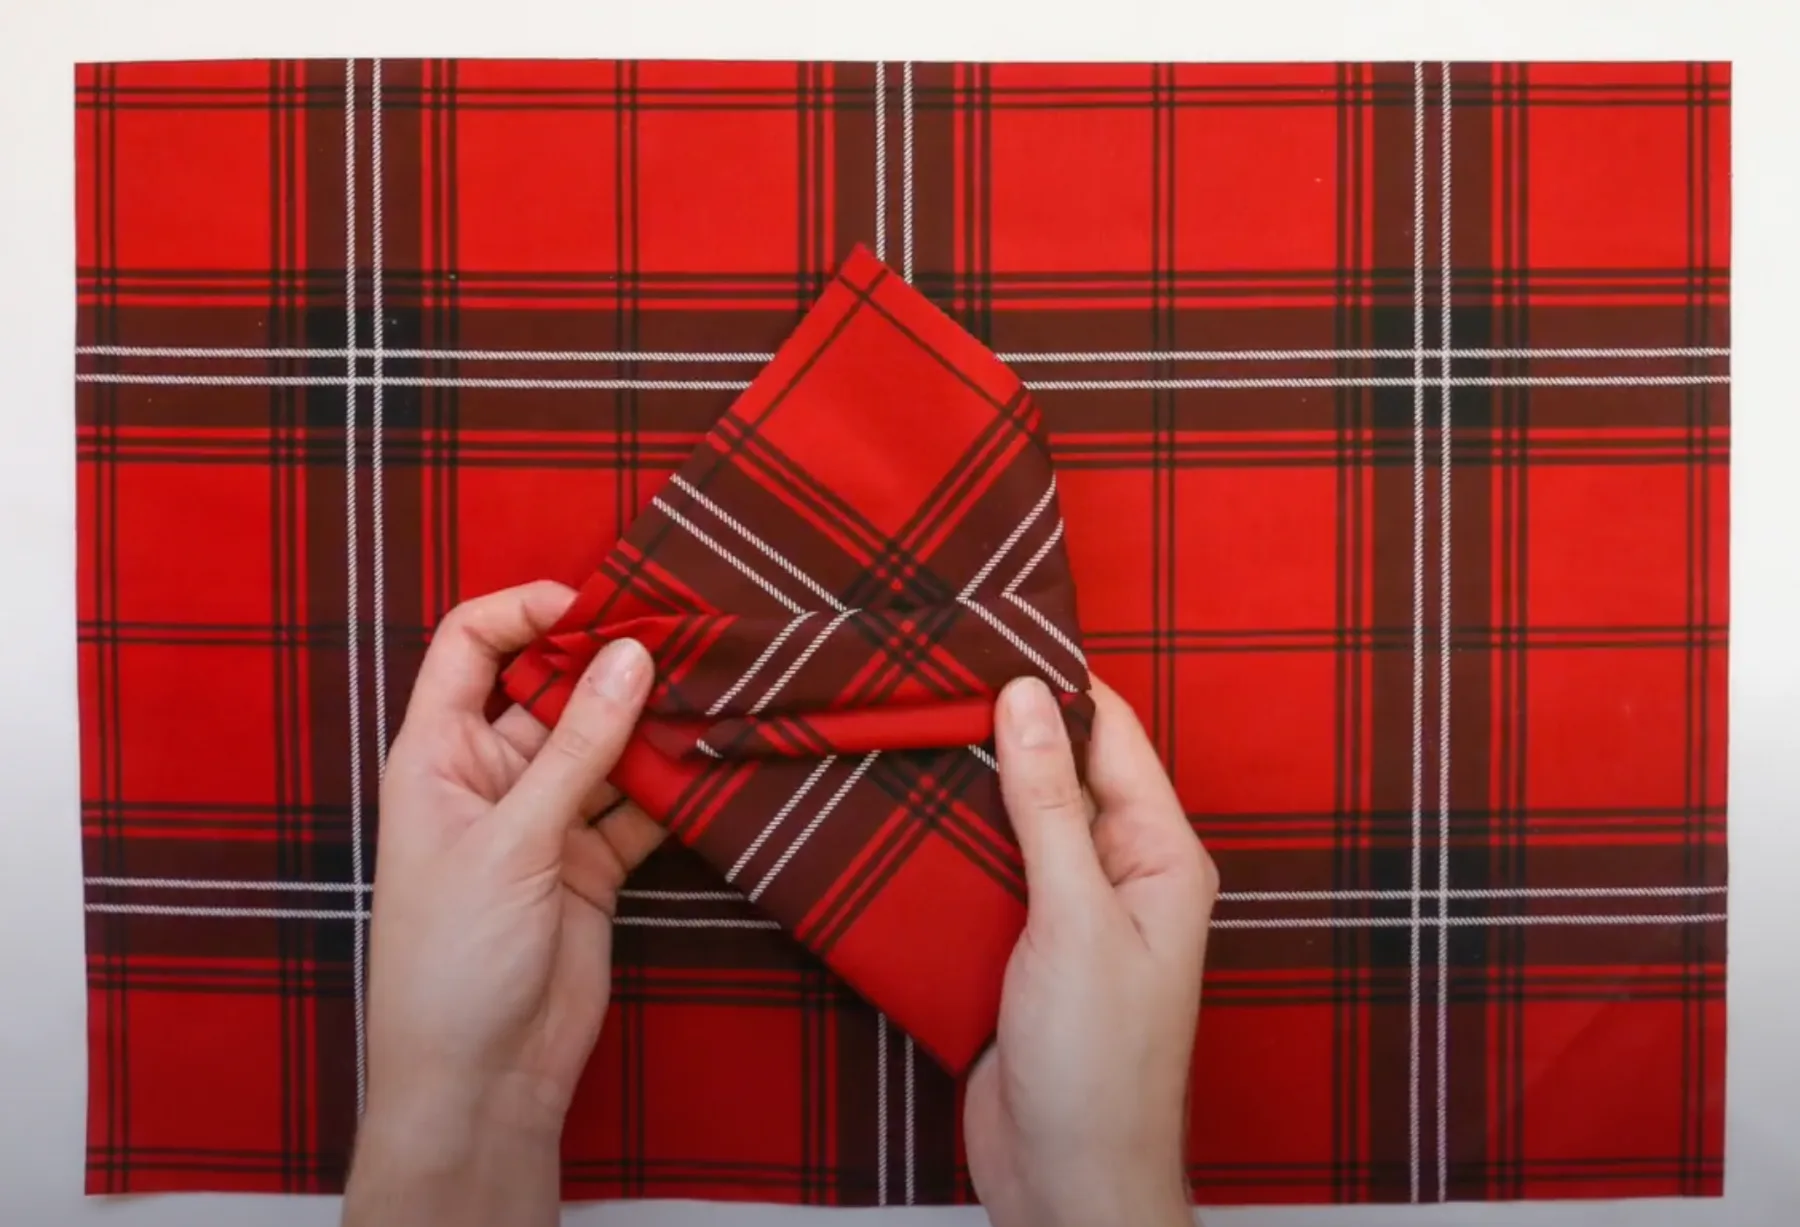
8- Do the same with the left corner, so that the rhomboid disappears and we get a rectangular napkin.
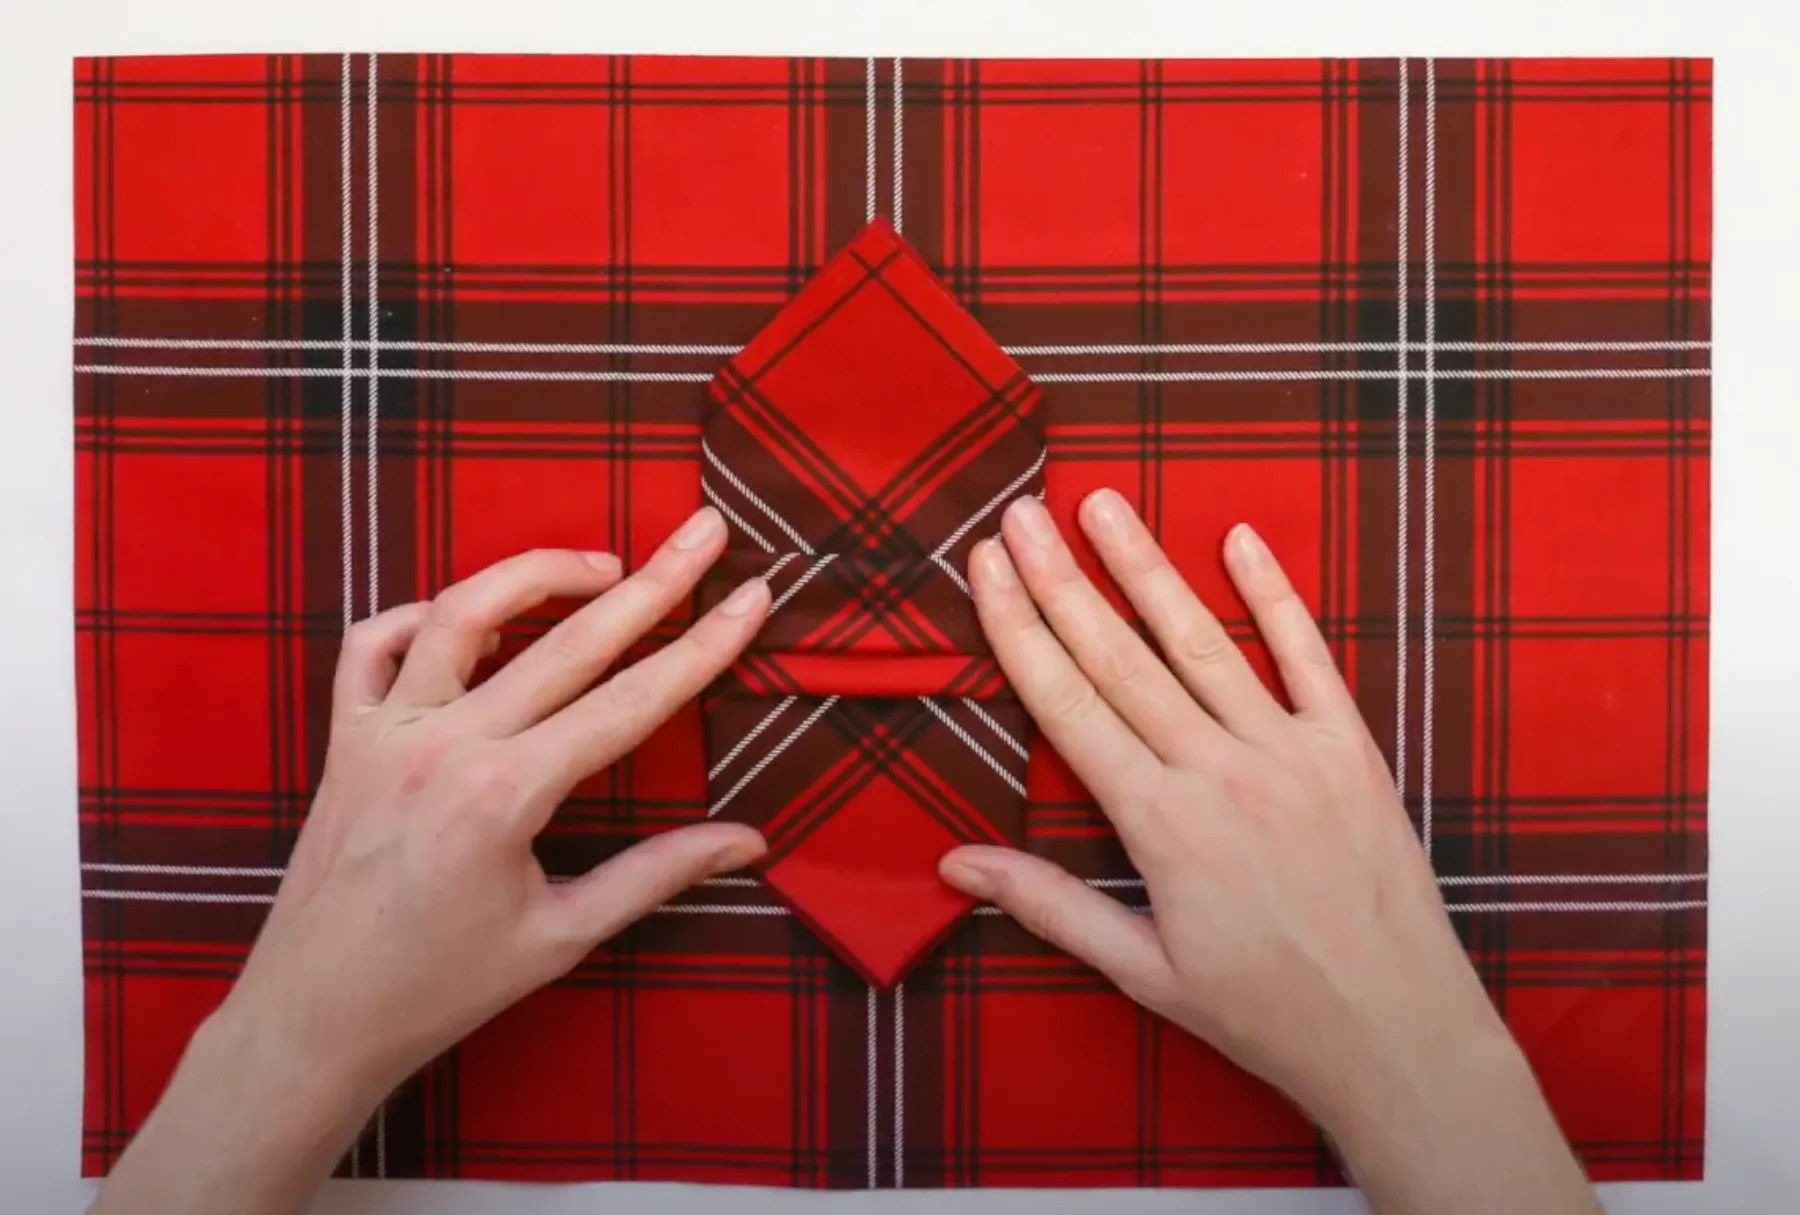
9- We now have an attractive cutlery holder! Place it on the plate and finish dressing the table to welcome your guests ;)